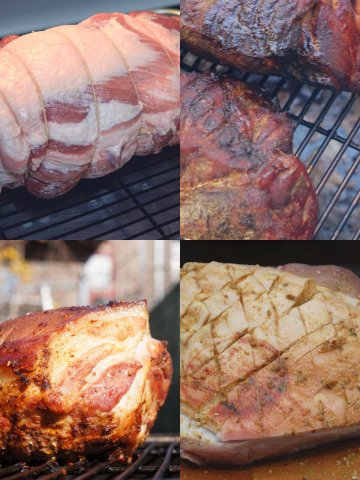
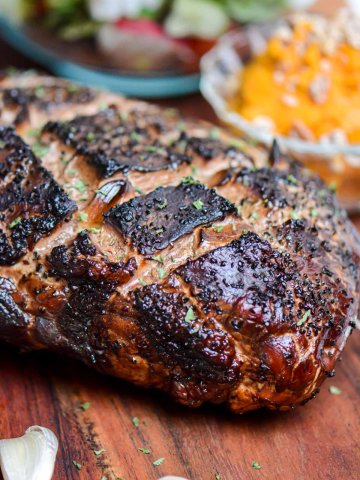
Grilled Pork Shoulder is one of those recipes that I grill every few months as it is extremely easy, delicious, and makes enough meat for several family meals. The flavors added by the grill make this a mouth-watering dish.

I typically use a simple salt and pepper rub since I use the meat for several other dishes. I also like to portion the leftovers, place them in vacuum seal bags, and freeze them for later use.
However, you can change up the rub and add a BBQ sauce to change up the recipe if your family wants it.
🐷 Ingredients
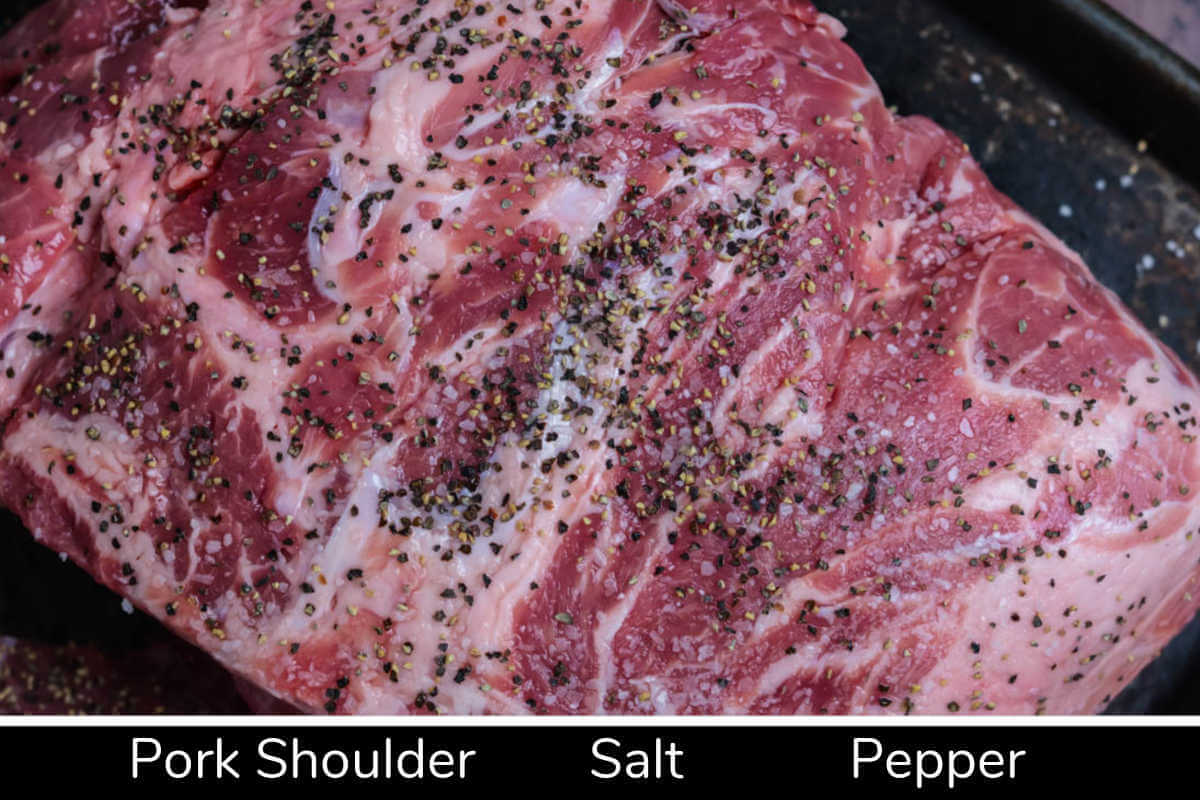
Pork Shoulder – Costco’s pork shoulders looked really fresh and we were excited to bring them home and grill. This is one of those low-and-slow grills that will feed our family for quite a while, so we usually need a bit of pre-planning to make sure that we have all the ingredients we need for the meals. I’ve used bone-in and boneless shoulders and both work well with this recipe.
Salt and Pepper – Because the pork is used in several recipes, I don’t typically season it with anything more than salt and black pepper. Every now and then, I will use my favorite all-purpose seasoning from Dizzy Pig, but simple salt and pepper were all I used this time. Make a quick batch of homemade pulled pork rub if you have an extra five minutes. It is well worth the flavor boost!
📌 Equipment
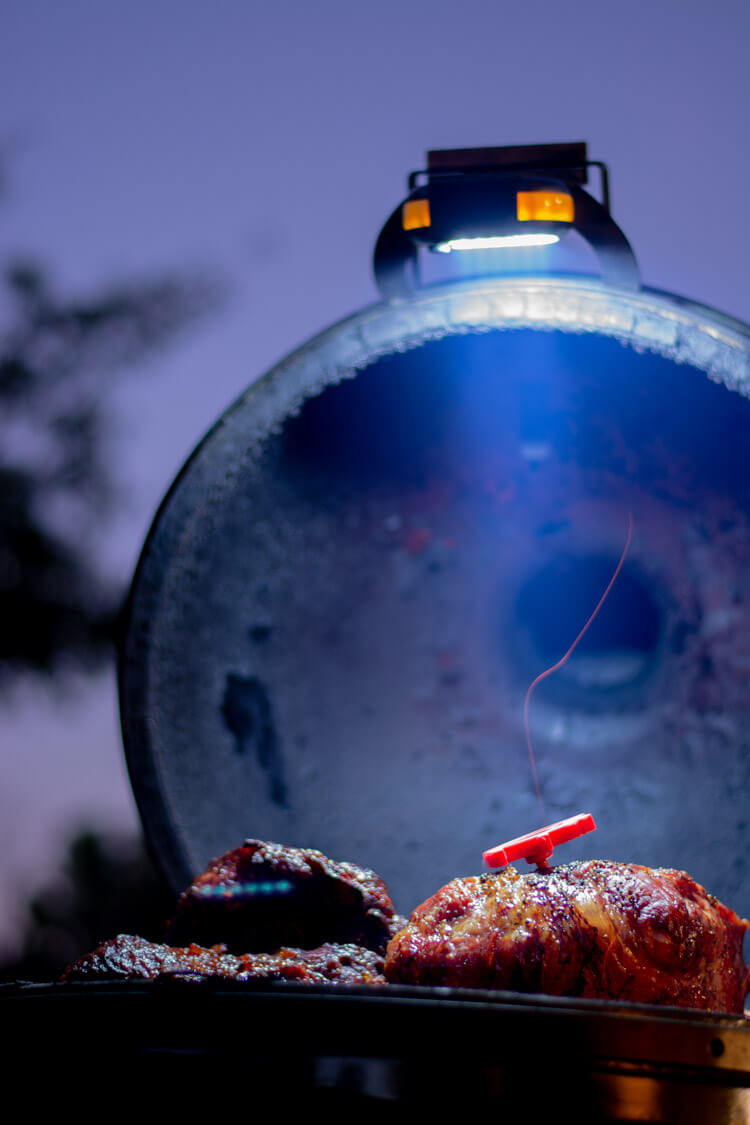
Grill – We use the Big Green Egg, but this can be used on and type of gas or pellet grill or smoker. If you are using a gas grill, you’ll set it up for indirect heat by turning off the center burners and only keeping the side ones on for a low to medium heat. If you are using a kamado style charcoal grill, add a plate setter to create the indirect heat.
Disposable Aluminum Pan – Use these to catch the pork drippings. Add a cup of water to it to minimize the risk of any flare ups.
BBQ Tongs – The key for these are to make sure that they are long enough. You’ll want to keep your arms away from the hot grill as much as possible. Don’t ask me how I learned that lesson!
Meat Claws – This is the most fun part of the recipe! Who doesn’t love shredding the pork? Using these meat claws to help with the job is a blast!
🔥 Grilling Instructions
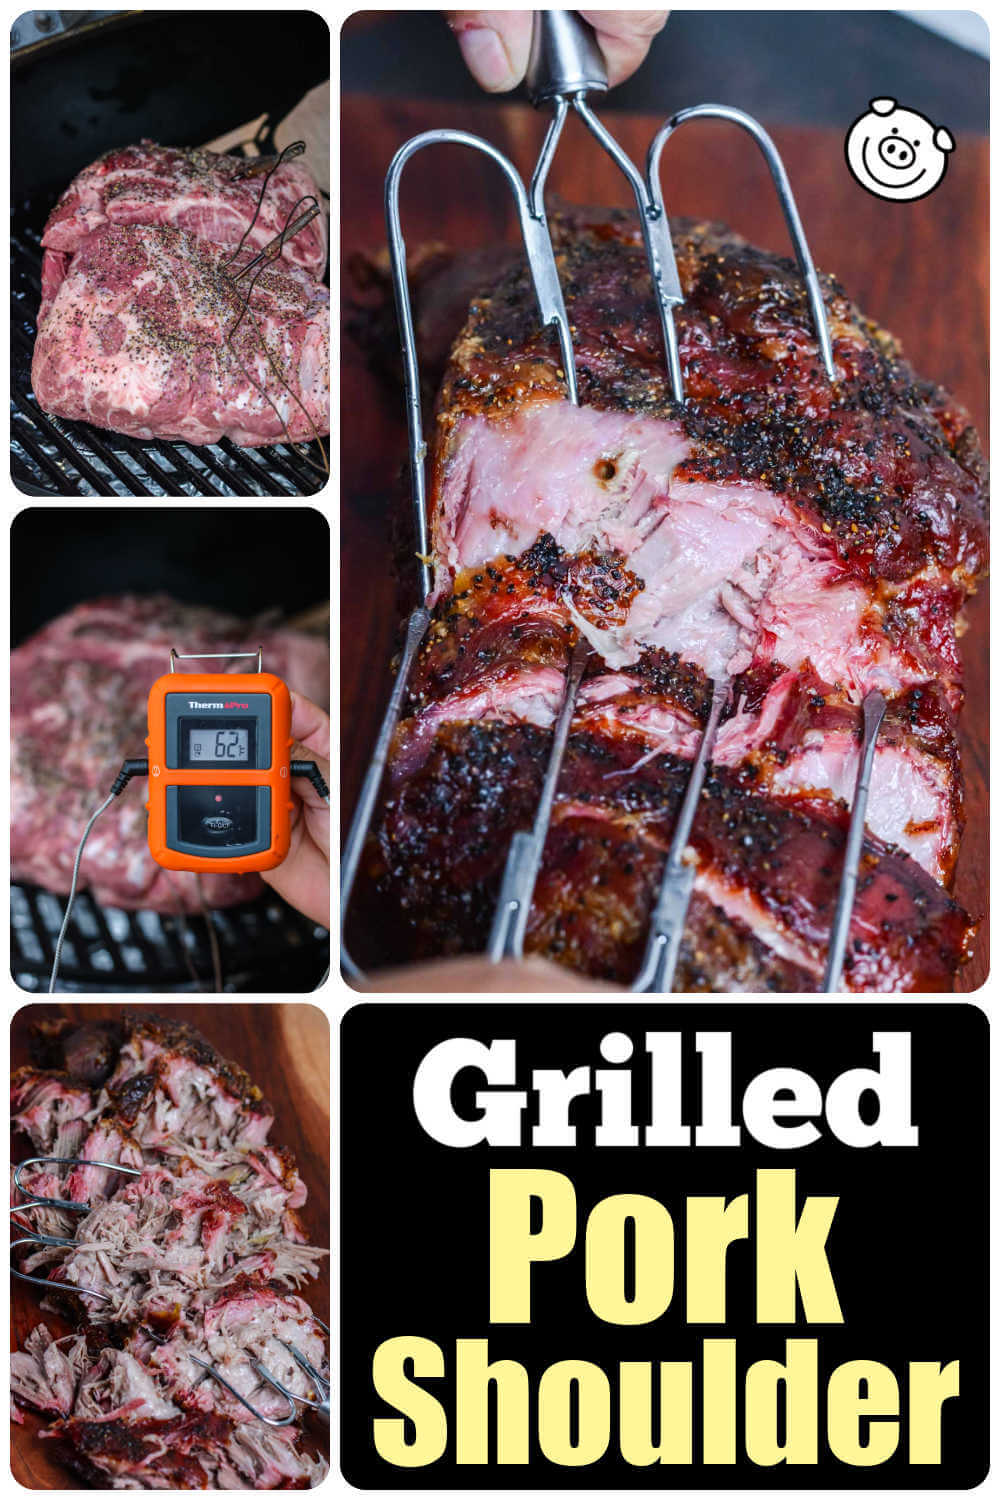
Step One: Light the grill and bring the temperature up to 225°F-250°F degrees.
Step Two: Set up the grill for indirect heat, with the plate setter added with the legs pointing up. At this point, close the lid and let the grill come back up to temperature. For gas grills, turn off the center burners to create the indirect heating environment.
Step Three: Place a drip pan on the plate setter. Set the pork shoulder directly on the grate with the fat side up. That allows the whole shoulder to have airflow and receive the flavoring of the smoke. For a gas grill, add a smoking box with wood chips. This is also a good time to add the temperature probes.

Because the shoulder was going to be used in several recipes, I did not add any wood chips and simply set the meat directly on the grill. The fat in the pork will render and it is best to catch it in the drip pan. Plus, it makes for a much easier cleanup!
Step Four: After you add the shoulder to the grill, the temperature will drop a little. Check on it after a little while, just to make sure that it stabilizes where you want it.
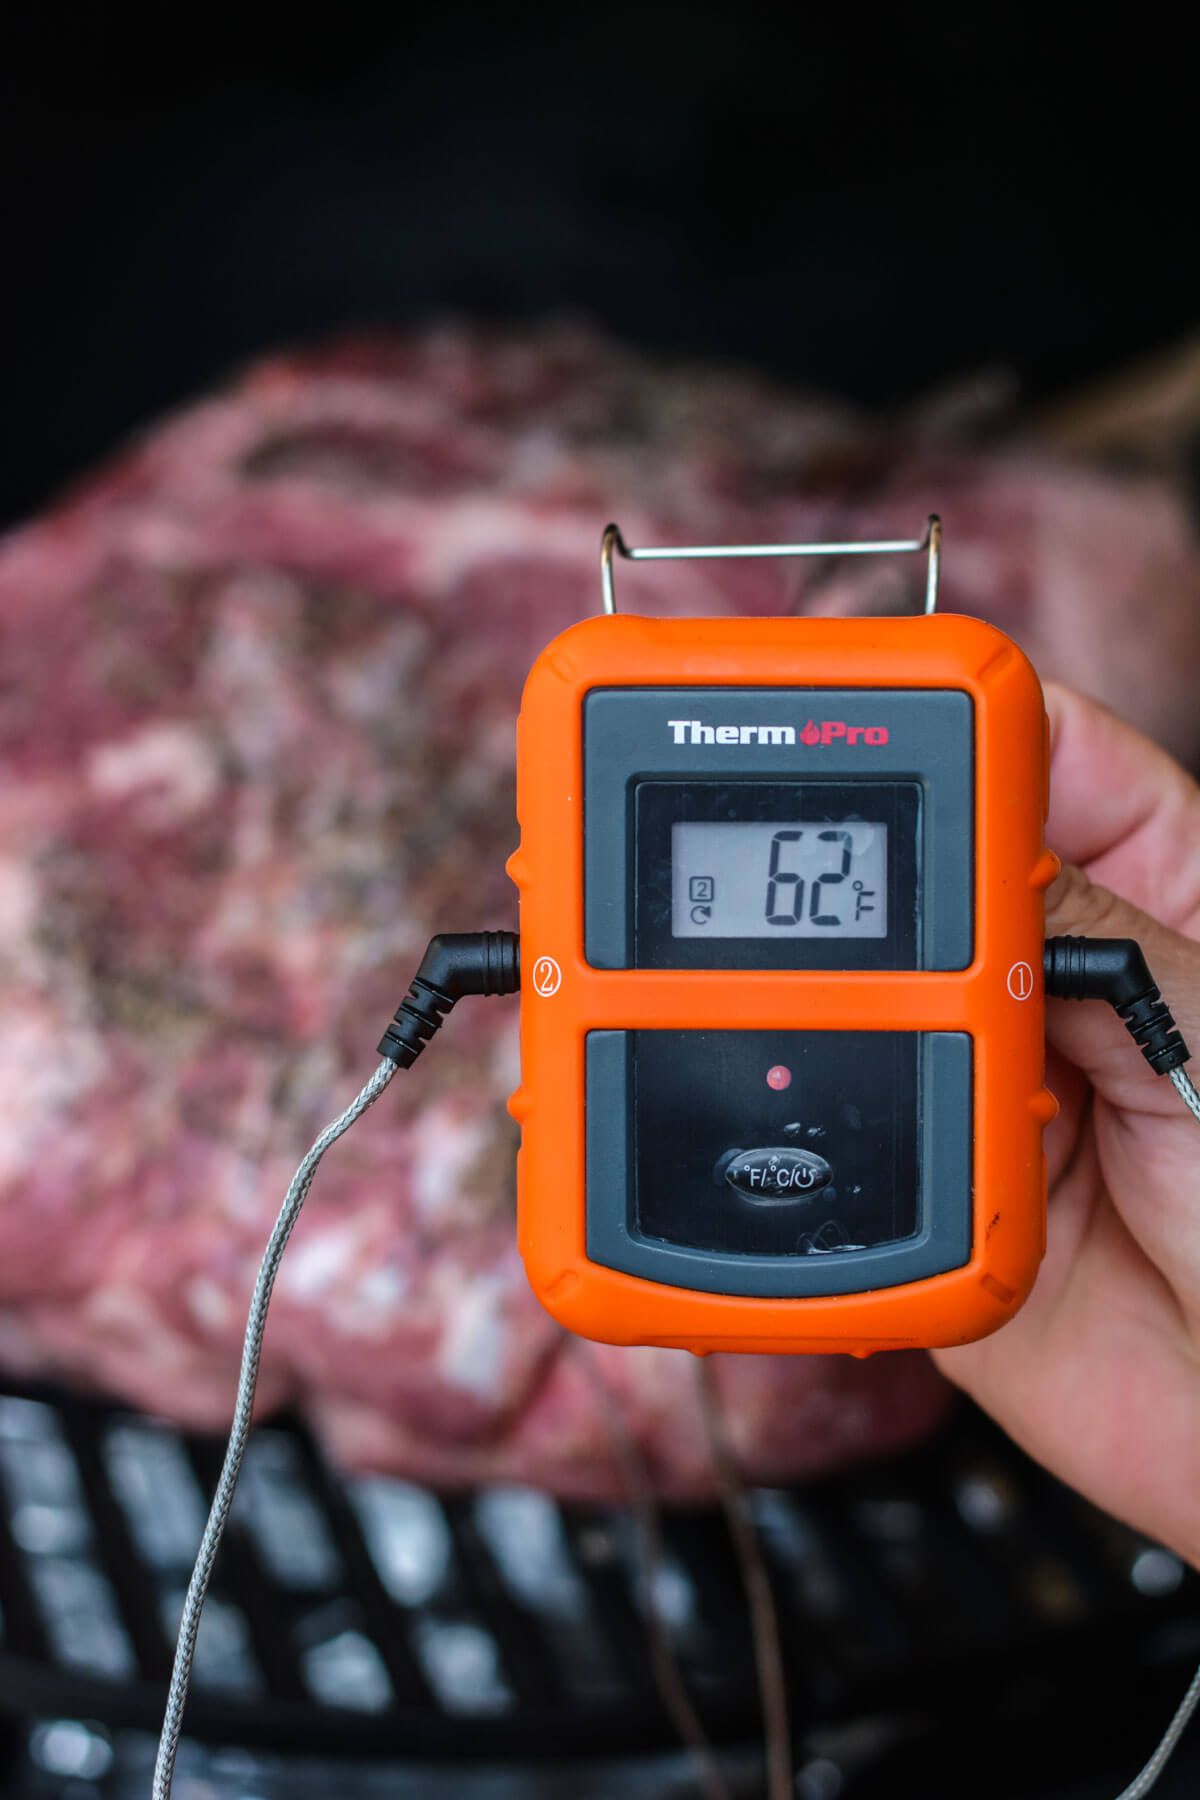
Step Five: Close the lid and let the pork cook slowly. It will take about 9-10 hours at 225°F, but the key is for the internal temperature to reach a safe temperature of 145°F according to the USDA. That said, we are aiming for a much higher internal temperature. Since we are planning to make pulled pork, we’ll keep it on the grill until it reaches 205°F. This temperature allows all the connective tissues in the meat to break down and makes pulling the pork as easy as can be! We have a handy printable pulled pork temperature chart that you can grab and use.
Optional: If you are having difficulty getting the internal temperature to reach 205°F, you can wrap the shoulder in butcher paper or foil. We discuss this technique in our wrapping pork butt guide. This technique also minimizes the risk of the meat drying out and you can add a cup of apple juice to add a great flavor while keeping it juicy and tender.
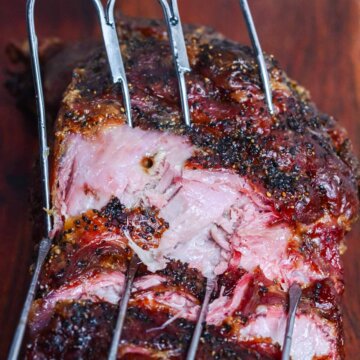
Step Six: When the internal temperature reaches 205°F, remove it from the grill and let it rest for 15-30 minutes. It’s a large cut of meat and takes a bit more time than smaller cuts. This allows time for the shoulder to cool slightly and seal the juices inside.
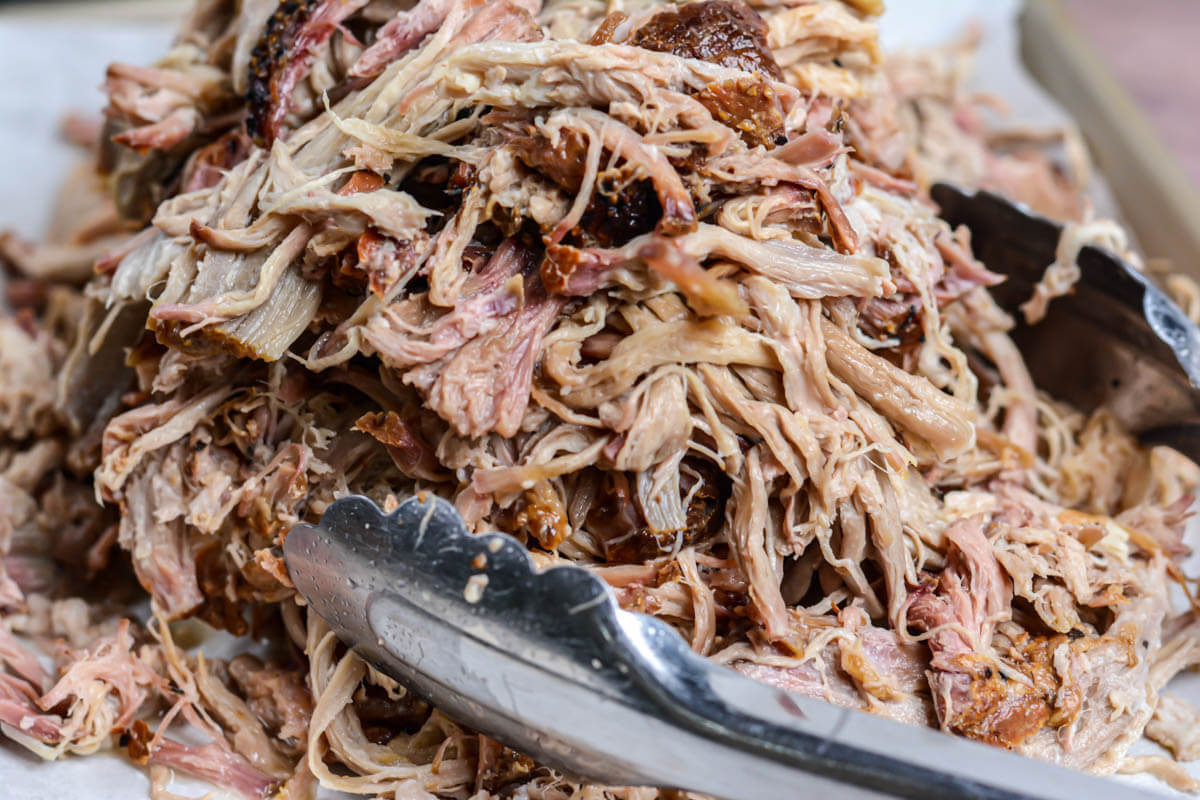
Step Seven: Start shredding the pork. It is easier to do this when the shoulder is warm, so don’t wait too long! We used meat claws to help with this process, but it is simple to use two forks or even just your hands.
❗ Recipe Tips and Tricks
Don’t Rush It – Low and slow provides the best results. This is not a fast recipe, so plan ahead to be home and monitor the progress. I used a wireless meat thermometer to keep an eye on the grill.
Use a Drip Pan – Expect that the fat in the pork will render and drip into the grill. To handle that, add a drip pan to avoid any foul smoke or flare-ups. I like to add some water to it as well.
Use Smoking Wood Chips or Chunks – Add a few wood chunks for adding a smoky flavor. While we have a post on making a smoked pork butt, you can easily add a bit of wood to this recipe to add a wonderful taste. As I use the pulled pork for multiple recipes, I like to add some apple, pecan, hickory or mesquite. This cut of meat is quite large, so you can afford to be a bit more bold with the intensity of the wood. If you ever have questions, refer to our wood smoking chart. It shows the most common wood types to use for various meats.
Searing First – Another technique is to sear the outside of the pork shoulder before adding it to the grill. By searing all sides of the shoulder, it closes the pores, allowing the juices to stay inside the meat longer. Additionally, this helps build a crispy exterior. I have tried this before, but haven’t really noticed a major difference if I was cooking it until I could pull it.
Pork Steaks – If you are not planning to pull this pork, you can slice it into pork steaks. These will have a similar taste to pork chops. In that case, you want to target an internal temperature of 160° – 170°F. Remember, the pork shoulder is a heavily used muscle on the pig, so the steaks may be a bit tougher. That is one of the reasons we cook the shoulder and Boston Butt to a higher temperature to give it time for the connective tissues to break down.
Troubleshooting Tips
Odds are, if you run into any troubles, it will be in one of these categories. But, don’t worry, there are solutions to each!
Flare-Ups – This can happen to everyone. The rendered fat from the pork drips into the heat source and causes a flare-up or a foul smoke. Check for this periodically, but it can be prevented by using a drip pan with a cup of water in it. The fat will drip into water and not the coal or gas burners.
Uneven Cooking – If you have used your grill for a while, you’ll know where the hot and cold spots are on the grate. If you are finding that part of the shoulder is cooking faster than other parts, just rotate it periodically to provide an even cook. This is a long cook, so you won’t need to do it often.
Temperature Fluctuations – This is the problem I see the most on kamado style grills. Gas grills and pellet grills, like the Traeger, are much easier to set the temperature and forget it. But charcoal grills are a different story. This requires a bit more monitoring. If you notice the grill is creeping up in temperature, reduce the opening in the top and bottom vents to reduce the air getting to the charcoal. It will take some time for the temperature to adjust, so try to catch it early when you see it edging up.
🧑🍳 Storage and Reheating
You will inevitably have leftovers unless you are making this for a large group of friends.
Freezer – I recommend adding serving-size portions to freezer-safe Ziploc bags and freezing them. They will last several months. We go into a lot more detail in our article on Can you Freeze Pulled Pork.
Fridge – Alternatively, cover the plate and keep it in the fridge for up to three days.
Vacuum Sealing – My favorite technique, though, it to use a vacuum sealer. Not only does this remove all the air from the bag, protecting the meat from any freezer burn, it greatly extends the useful life. When I have a busy day, I can just grab one out of the freezer, defrost it and use it for a quick meal.
Reheating – The best way to reheat pulled pork is to let it defrost in the fridge, remove the amount you want to use and microwave it in a bowl for a minute or two. If you are reheating a large amount, add the meat to a disposable pan or cast iron skillet and cover with foil. Place it in the oven at 275°F for about 20-30 minutes.
Note: Consider adding half a stick of butter or some vegetable broth to the dish before covering. This will add some additional flavor and keep everything nice and juicy!
Additions and Substitutions
Dry Rub – The easiest way to change this recipe is to use a different BBQ rub. I used a simple salt and pepper rub, since I planned on using the pork in several recipes, but consider making your own. Garlic Powder, paprika, oergano, cumin, onion powder and kosher salt are some of the most common ingredients in custom rubs. You can also refer to some of our other dry rub recipes like our pulled pork rub, all purpose rub, and the rib rub.
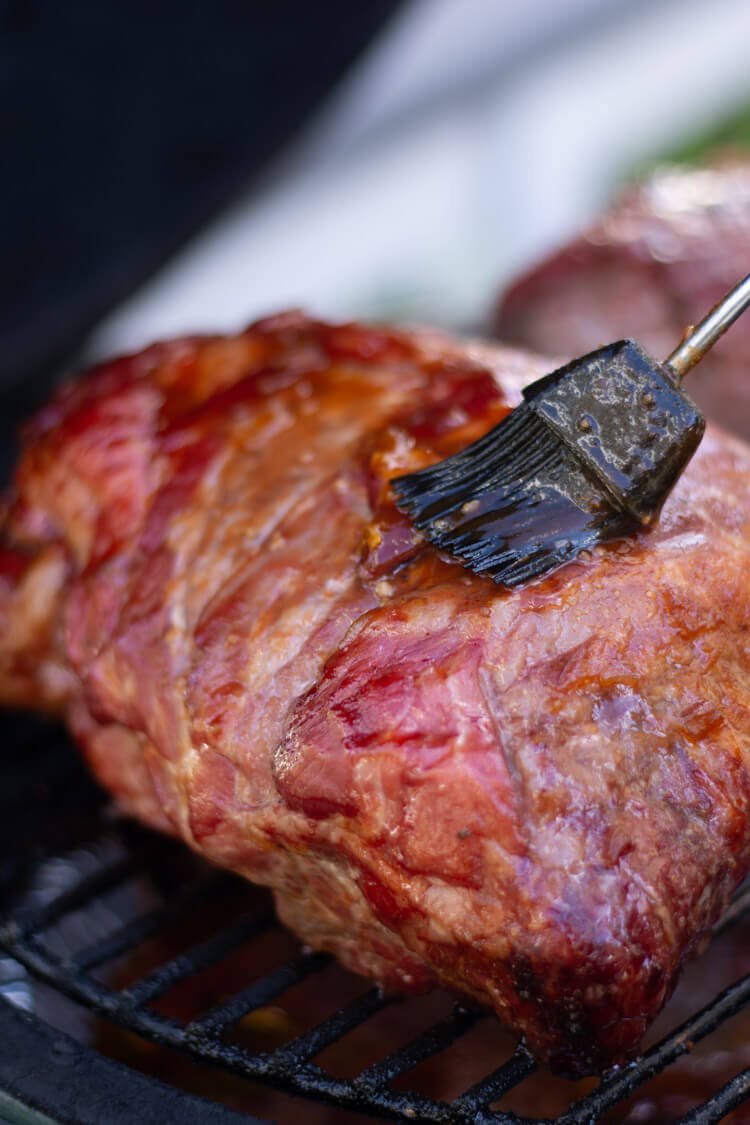
BBQ Sauce – I will sometimes brush a BBQ sauce on the shoulder as it is nearing the end of the cook time. This adds an amazing flavor, and it will become sticky and catch more of the wonderful grilling flavors. We have some homemade BBQ sauces you can try, like the Whiskey BBQ Sauce or the Cherry Bourbon BBQ Sauce (My all-time favorite!).
Smoked Pork Butt – If you want to go all-in on the smoky flavors, then check out the options in the smoked pork butt recipe. The key to success is to use a low, slow trickle of smoke over a long period of time. We’ll walk you through the types of wood and techniques to help you be successful.
Serving Suggestions
We’ve got a whole post on our favorite sides for pulled pork, but we included a few of the family favorites below.
Potato Dishes
Smoked Potato Salad is a great side dish to serve with the pork shoulder. It is hearty and is a fun twist on the classic recipes. You’ve already got the grill going, so add a few, small potatoes while the pork is cooking.
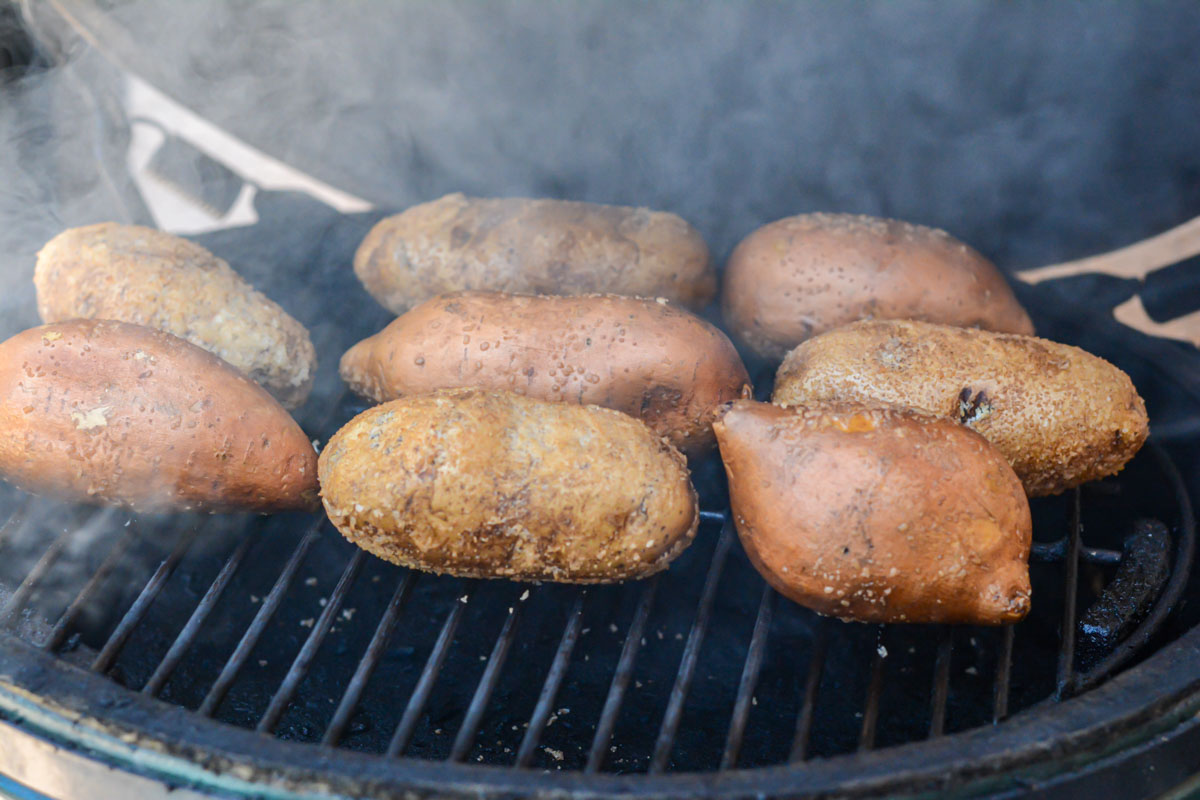
I like to smoke both the sweet potato and baker potatoes on the grill. It is easy to prepare and you’ll have plenty of time for the pork to finish, so throw a few on.
Grilled Vegetables
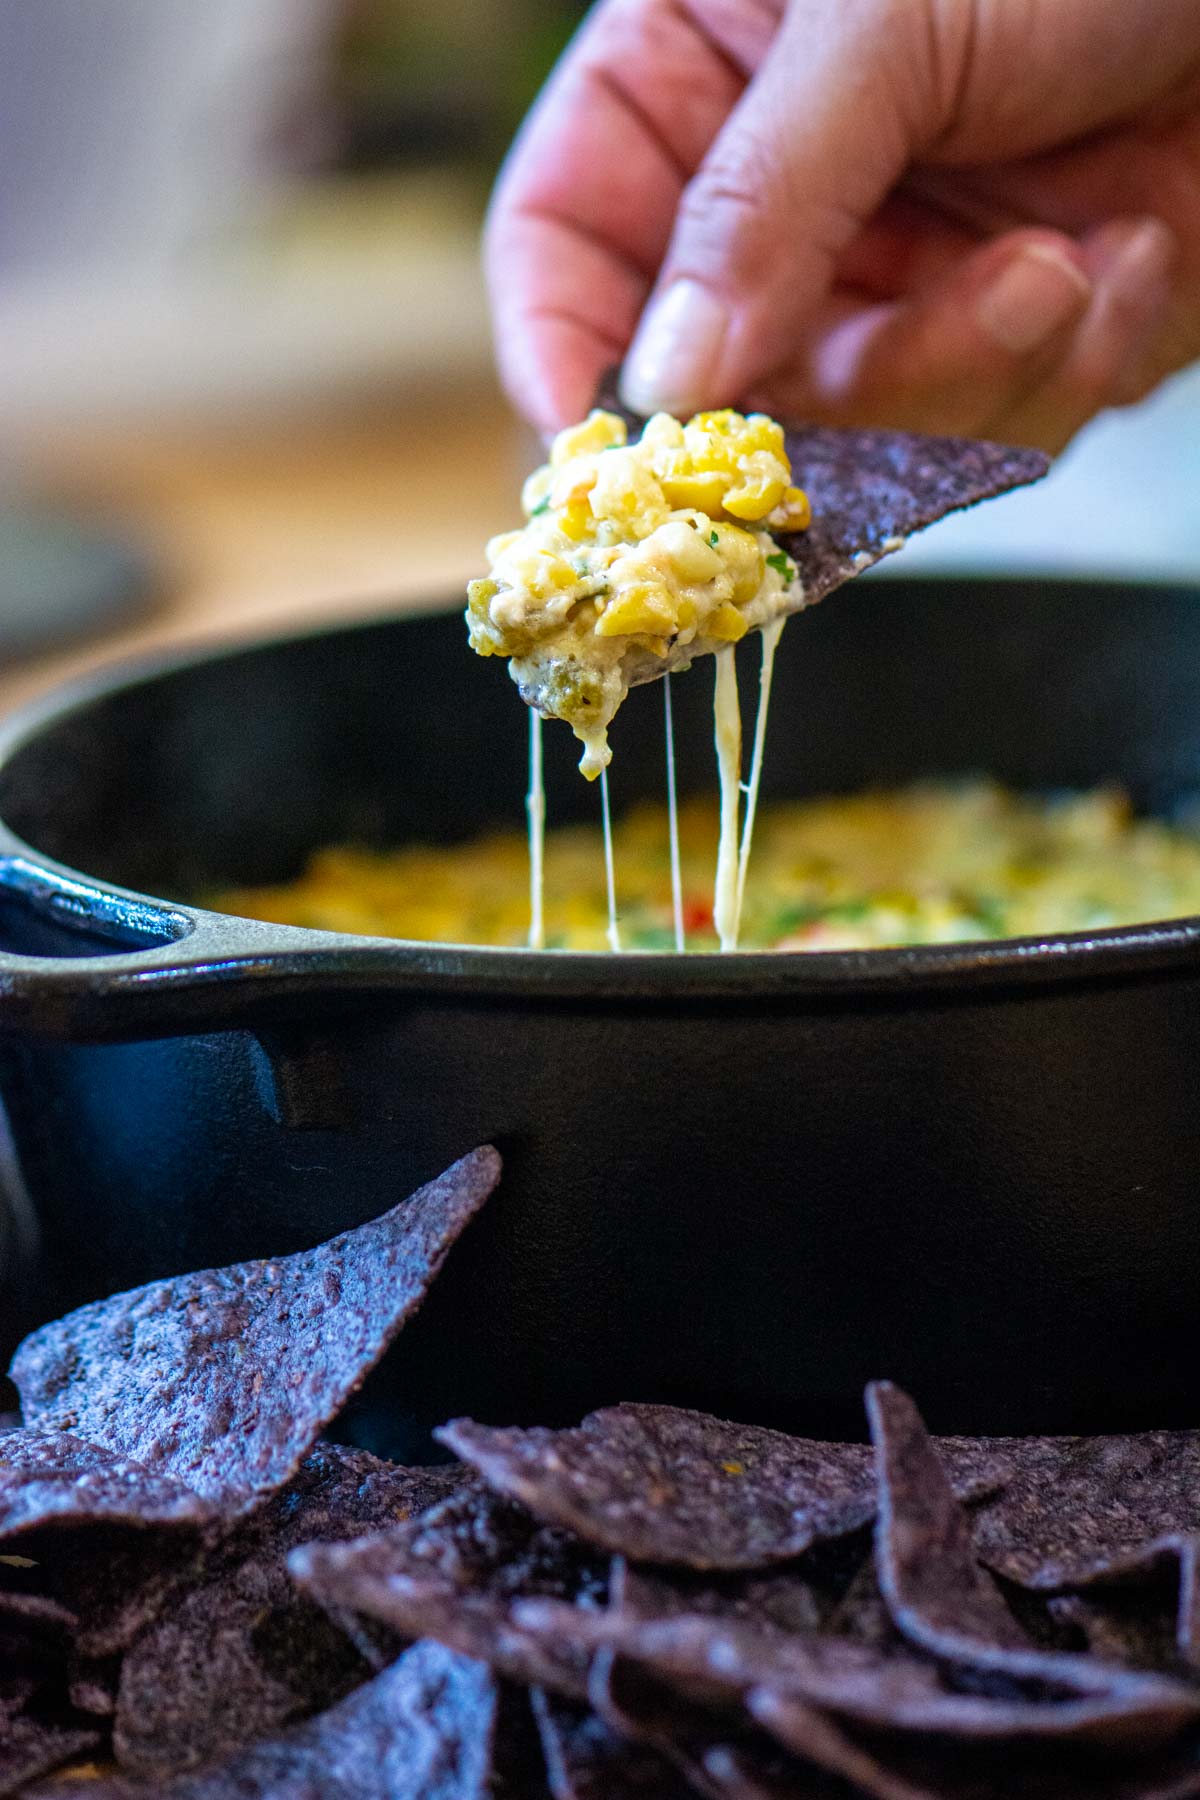
A nice corn on the cob is always a great complement to a BBQ! You can grill the corn in the husk, or prepare it ahead of time and grill the corn in foil. Either way, your guests will love them! If you have leftover corn, make sure you keep it and make this crack corn dip. Let nothing go to waste!
Grilled Broccolini is extremely simple and takes just a few minutes. The colors are almost as amazing as the taste!
Grilled Sweet Onions are another easy option. They are virtually caramelized, and their flavor complements the pork perfectly!
Pulled Pork Options
❓ Recipe FAQ
Yes! The fat on the shoulder will render, turning to a liquid. If the majority of the fat is at the top of the shoulder, it will slowly render and drip down the cut of meat. This should help it retain its juiciness and it will turn crispy, sealing the juices inside the pork.
Yes! Turn off the center burners to create an indirect heating environment and set the temperature to 225°F. Follow the instructions above to cook the pork shoulder. You may want to use a smoking box in the gas grill to add a bit of that wonderful smoky flavor.
It takes about 8-10 hours cooking on indirect heat at 225°F. That said, the real measure should be the internal temperature of the pork shoulder. It is ready for pulling when it reaches 205°F.
Yes! Pork Shoulder is perfect for a BBQ! The preparation is extremely easy, but it does take some planning given the long cook time. It will be family favorite recipe!
Related Posts

Grilled Pork Shoulder
Equipment
- Disposable Aluminum Pan
- Meat Claws
Ingredients
- 1 whole Pork Shoulder large
- 2 tbsp Pepper coarse ground
- 1 tbsp Salt coarse ground
- 1 tbsp Olive Oil optional
- ½ cup pineapple juice optional
Pork Butt BBQ Glaze (optional)
- 1 whole Onion chopped
- 2 cloves Garlic chopped
- 1 cup Brown Sugar
- 1 cup Ketchup
- ½ cup Apple Cider Vinegar
- ½ cup Water
- ¼ cup Butter
- 3 tbsp Worcestershire Sauce
- 2 tbsp Sriracha Sauce
- ½ tsp Chili Powder
Instructions
Prepare the Pork Shoulder
- Trim any excess fat off the pork shoulder
- Pat the pork shoulder dry with a paper towel
- Rub the salt and pepper mixture over the meat. If it isn't sticking as well as you wanted, rub a little bit of olive oil on and then add the salt and pepper mixture.
Prepare the Grill
- For a Kamado-style grill, light the grill and add the plate setter. For a gas grill, turn on the outside burners, but leave the center ones off.
- Stabilize the temperature around 225°F – 250°F.
- Place a disposable aluminum pan under the grill grate to catch the drippings and add a cup of water to it. Add the shoulder to the grate and insert the temperature probes.
Grill the Shoulder
- Set it and forget it!
- Check the shoulder periodically for the desired temperature.
- If you want to slice the pork, remove it when the internal temperature reaches 160° – 170°F. If you want to shred it, remove when the temperature reaches 205°F.
Wrap the Shoulder (Optional)
- During the last hour or so of grilling, wrap the shoulder in aluminum foil or butcher paper and add ½ cup of fruit juice inside the foil (pineapple juice is my favorite). Wrap the foil around the shoulder and return it to the grill.
For the BBQ Glaze (Optional)
- Combine all ingredients in a pan on the stove top and bring to boil
- Reduce temperature to simmer for at least 20 minutes
- Remove from heat and let thicken
- Brush the mixture on to the pork shoulder every two hours after your fourth hour of slow grilling
- Enjoy the delicious, tangy grilled pork in any number of dishes!
Notes
Nutrition

Jason’s been firing up the grill for over 30 years after graduating from the US Coast Guard Academy. His love of finely-grilled steak and chicken led him to buy his first Weber grill to put on his apartment patio in 1992. Each military move led to a new grill (a mixture of gas and charcoal) until he fell in love with the Big Green Egg in 2008. Since then, he has added another 4 grills to the collection. Yes, he has a problem. Jason loves smoking in the ceramic BGE with exotic woods including olive wood from Egypt and hard to find varieties such as sassafras and orange wood. Jason takes the term “foodie” to a whole new level, jumping at the chance to take food tours and cooking classes during foreign travels. These have provided inspiration to incorporate new ideas into recipes when he gets back home. He has been featured in Fox News, Parade, Yahoo News, Kansas City Living and more. After retiring from the military and moving to southwest Florida, he has focused grilling and smoking locally sourced meats and fish (read: he likes to catch his own fish!)


Leave a Reply