Imagine juicy, sweet corn bursting with smoky, charred flavor – and it’s all thanks to your grill! Once you learn how to grill corn on the cob in foil, you will never want to boil a pot of water again! This method delivers perfect results every time. Just look at this and tell me you don’t want to take a bite!

Oh man, if you have never had grilled corn on the cob before you are in for a treat!
Grilling corn on the cob in foil offers the perfect balance. The foil packet acts as a mini-steamer, ensuring plump and juicy kernels, while the heat allows some of the kernels to caramelize for a touch of smoky sweetness.
And there’s another bonus: You can literally throw away your cooking vessel (foil) and keep the mess out of the kitchen and off the grill. Clean-up is the easiest thing ever.
🌽 Ingredients
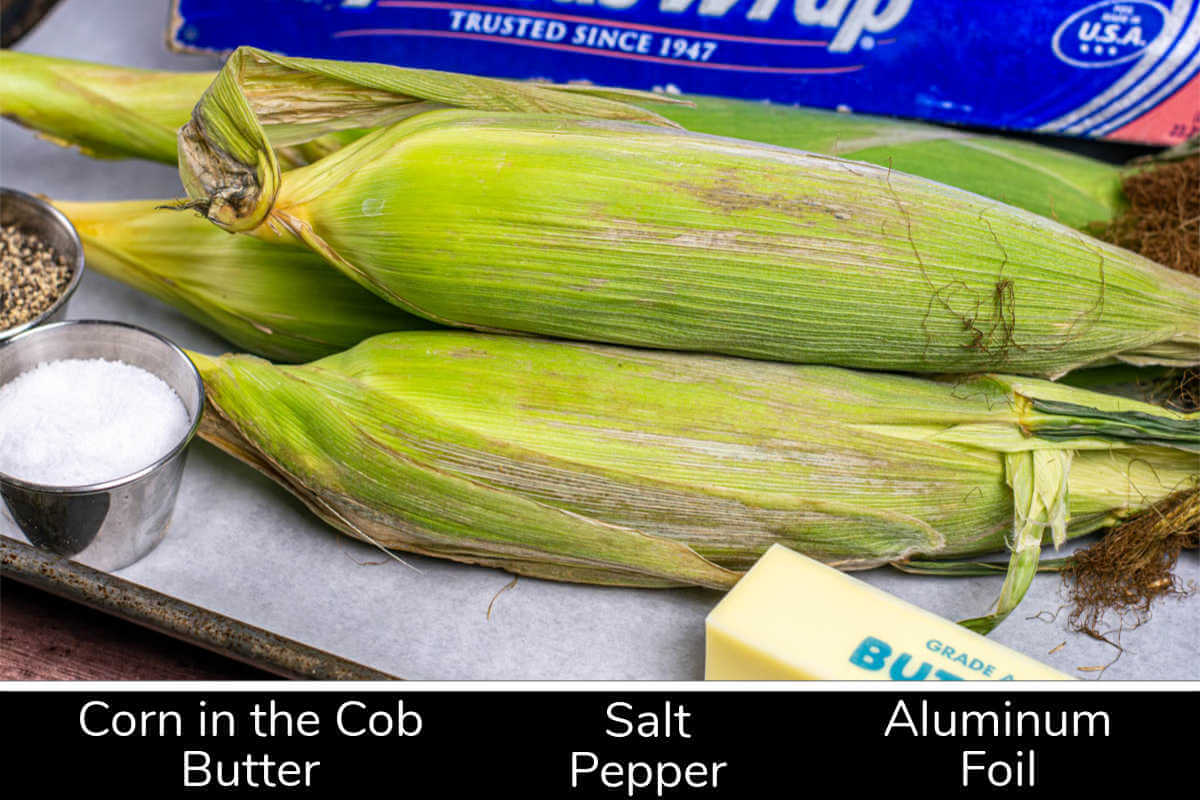
🛒Corn on the Cob – Choose fresh, sweet corn with bright green husks and plump kernels that are a milky white or pale yellow colors. The ears should feel firm and be evenly filled out.
Quick freshness test: press a fingernail into a kernel. If milky juice comes out, the corn is at its peak. A local farmer’s market is one of the best places to find high-quality corn.
🛒Butter – Room temperature, for easy spreading.
🛒Salt and Pepper – To taste.
🔥 Instructions

👉Step 1: Shuck the corn, remove the silks, and cut off the end. Once all, or at least most, of the silks are off the cob give it a quick rinse.

👉Step 2: Use a pastry brush to smear the cobs with room-temperature butter on all sides. Don’t use melted butter. It will just run off the corn instead of getting into all the cracks and crevices.
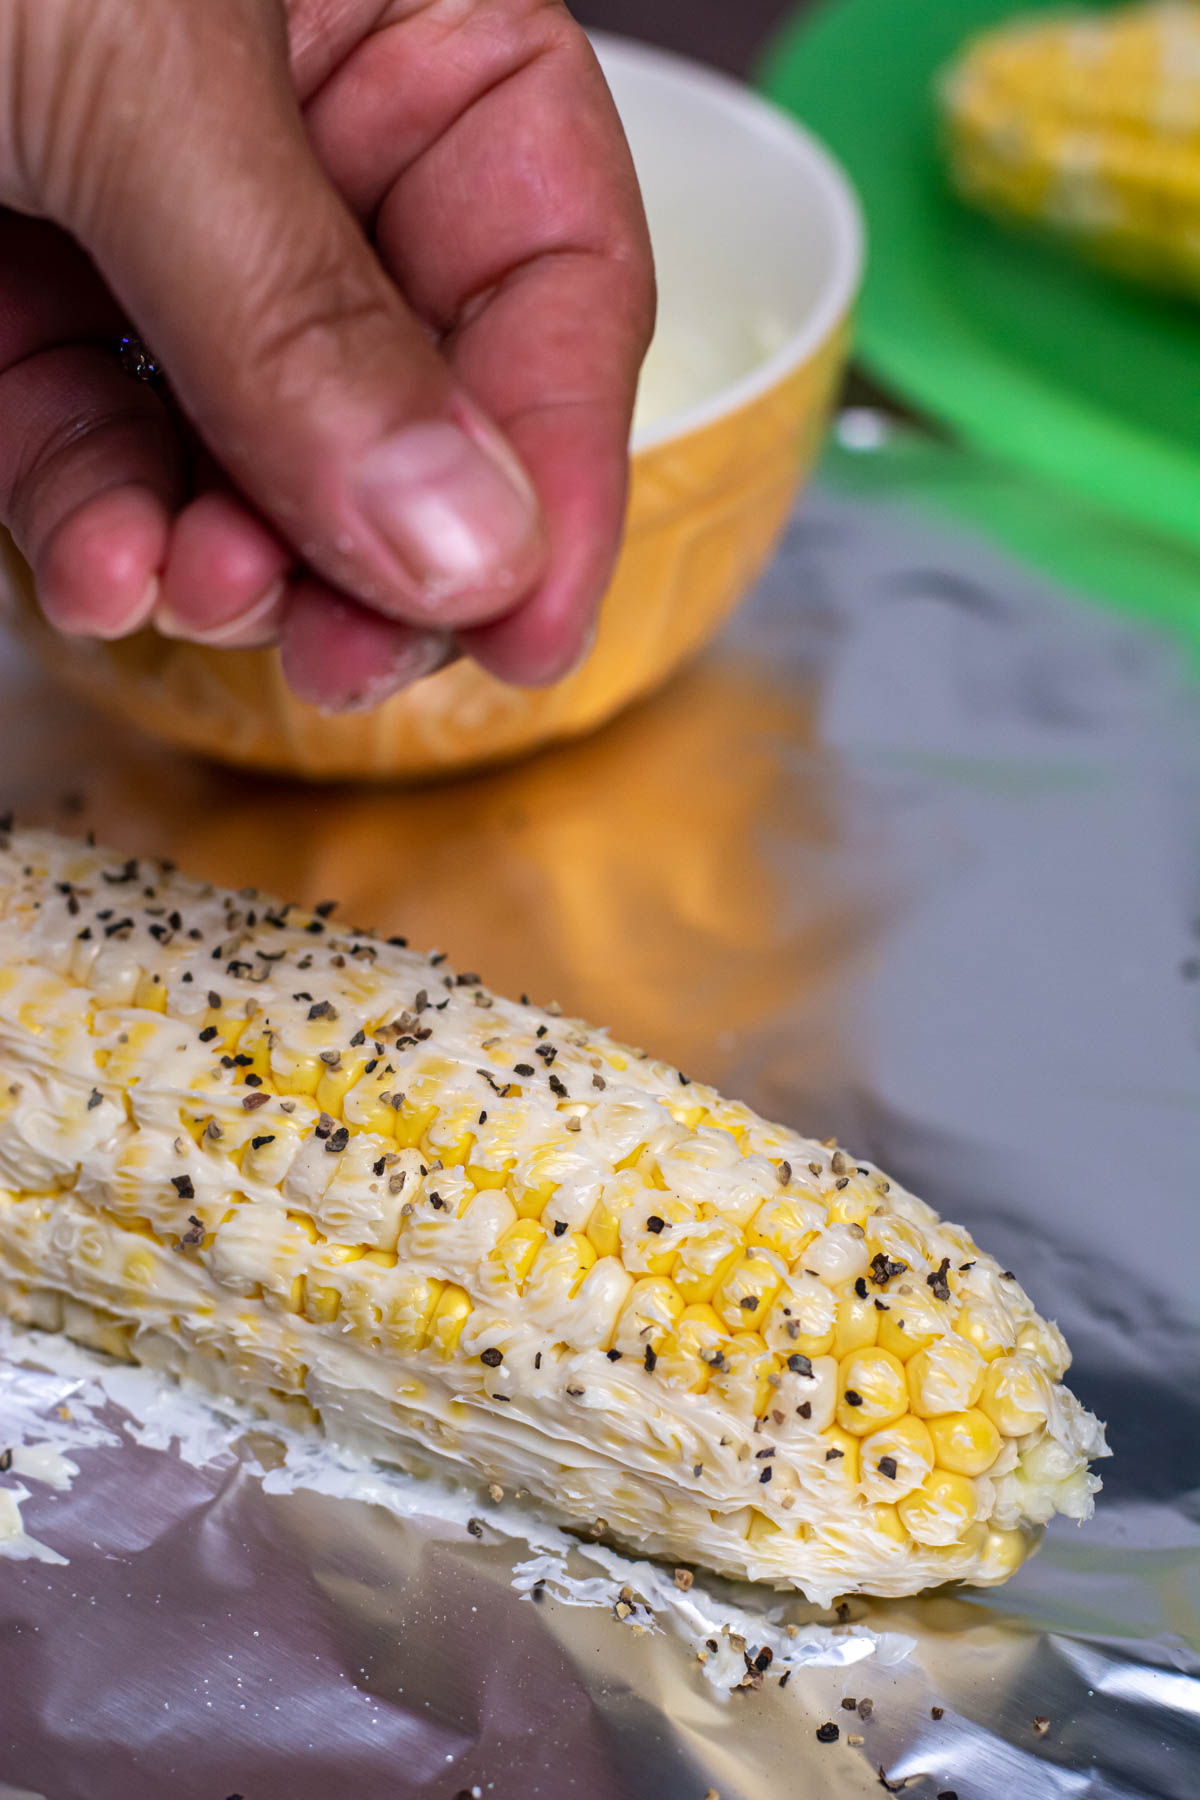
👉Step 3: Sprinkle salt and pepper on the buttered cobs.

👉Step 4: Wrap each cob of corn individually in foil. Make sure to wrap it up tightly so it’s well-sealed and doesn’t leak out butter.
👉Step 5: Preheat your grill to medium-high heat (375°F-425°F).

👉Step 6: Place the wrapped cobs on the grates, and close the lid. Let them grill for 20 minutes, flipping halfway through.

👉Step 7: Remove from the grill and open the foil packets to check the corn for doneness (be careful, hot steam will be released!). It should be tender and lightly charred in spots. Serve immediately and feel free to add your favorite toppings.
❗ Corn Shucking Tips
If you grew up in the country shucking corn by the trunkful you might view this task as a drudgery. I have a piece of advice. Give the job to your kids. Kids without that history love shucking corn!
📌Basic Method | Peel back the green husk and break off the base to remove it (or cut it later). Then, rub your hands up and down the cob to remove most of the silk. Pick off stubborn strands individually or use a vegetable brush.
📌Cleaning The Cob | If you find any bad or messy spots on the corn you can trim them off with a knife.
📌Cob Holders | If you want to use cob holders, it’s a good idea to also cut the tip end.
Cob holders are small handles with steel prongs that stick into the ends of the corn and give you something to hold onto while eating fresh, hot corn on the cob.
🧑🍳 Storage and Reheating
🔶Leftover Cobs | Place your leftover cobs in a plastic zipper bag or an airtight container in the refrigerator for up to a week. Discard if it gets mushy or slimy.
🔶Kernels | You also have the option of cutting the corn off the cob for future use. Place the kernels in a sealed container or bag and store it in the fridge for up to a week or freezer for up to a year.
🔶Reheating | Reheat leftover cobs in the microwave for 20-30 seconds, or warm in boiling water for 1-2 minutes.
Frozen kernels can be reheated in the microwave or on the stovetop. Add butter and heavy cream for a special treat!

🌶️ Flavor Variations
✔️Seasoning Blends | Do you love seasoning? Quite a few dry rubs also work to flavor up your grilled corn on the cob in foil. Try a sweet and smoky rub or a pineapple rub for starters.
✔️Mexican Street Corn Inspiration | Use the method above to grill your corn but skip the butter and make a delicious mayo sauce with Cotija cheese and Mexican flavors to slather on the cobs after grilling. Grilled Mexican Street Corn is such a delightful twist and totally worth trying!
✔️Grilled Beer Corn | For a unique twist, skip the foil, pre-boil the corn in beer, then grill directly on the grates until charred and tender. Grilled beer corn has a unique flavor and is a great BBQ dish for summer cookouts.
✔️More Flavor Ideas | The mild taste of corn lets you try all sorts of flavors. Try these great combinations or come up with new ones:
- Parmesan cheese and fresh herbs
- Garlic butter with a sprinkle of paprika
- Honey butter with a pinch of cinnamon
🔁 Substitutions
👍Other Grilling Methods | No foil in the house? Try grilling your corn on the cob in the husk or pre-boil the corn and grill it over direct heat until slightly charred on all sides.
👍Butter Alternatives | Here are some butter substitutes that pair well with corn on the cob:
- Olive oil
- Light mayo/Greek yogurt
- Vegan butter
- Ghee (clarified butter that’s lactose-free)
- Infused oils (such as chili oil and truffle oil)
🍽️ Serving Suggestions
Main Dishes To Pair With
⭐Proteins | Grilled chicken, steak, seafood (especially shrimp), burgers, hot dogs, pork chops, sausages…the list is endless!
⭐Beyond BBQ | The natural sweetness of corn makes it an excellent partner for Mexican dishes such as fajitas and tacos, Caribbean jerk seasoned dishes, and Asian-inspired recipes such as stir-fries, tofu, and ramen bowls.
⭐Vegetarian Mains | Pair your tender grilled corn on the cob in foil with your favorite vegetarian mains. It can be anything from grilled veggie skewers to black bean burgers and grilled halloumi cheese.
Creative Leftover Corn Uses
⭐Dips & Salsas | Grilled corn kernels are great for dips and salsas. Some of my favorites are the beer corn crack dip, avocado corn salsa, and grilled corn & black bean salsa.
⭐Fritters/Pancakes | Add leftover kernels to batter for cheesy corn fritters or savory scallion pancakes.
⭐Soup | Toss leftover corn into a creamy chowder or a spicy tortilla soup for extra texture and sweetness.
❓ Recipe FAQ
About twenty minutes on medium-high heat. If your grill runs hot, watch the corn closely and flip it more often to prevent burning. In that case, it will be finished sooner.
Yes. Increase your cook time to 25-30 minutes at medium-high heat.
To freeze whole cobs of fresh summer sweet corn, blanch the cobs for four minutes in boiling water and then drain them and place them in a freezer-quality plastic bag.
Sealed and frozen, the ears will keep for six months in a deep freeze. Of course, you can also buy frozen corn at the grocery store, but it doesn’t taste nearly as good and can get rubbery fast.
Related Recipes


Tried this recipe? Please leave a star ⭐️⭐️⭐️⭐️⭐️ rating in the recipe card below and/or a review in the comments section further down the page. You can also stay in touch with me through social media by following me on Instagram, Pinterest, and Facebook!

Equipment
- Grill
- Aluminum Foil
- BBQ Brush for smearing butter on the corn (you can also use the back of a spoon)
Ingredients
- 4 ears Corn
- 4 oz Butter room temperature
- salt and pepper to taste
Instructions
- Start with removing the husks off of the ears of corn, including the corn silk strings. Cut off the end of the corn to clean it up. Rinse.
- Brush the corn with the room temperature butter with the bbq brush or the back of a spoon on all sides.
- Sprinkle with salt and pepper, to taste.
- Place each ear of corn in a piece of aluminum foil and wrap it up tight so the butter doesn't leak out.
- Preheat your grill to medium-high heat (375°F-425°F).
- Place the wrapped ears of corn on the grill grates. Cook with the lid closed for a total of 20 minutes, turning over at the 10 minute mark.
- Remove from the grill and carefully open the foil packets (hot steam will come out). The corn should be tender and show charring here and there.
- Serve hot, with or without toppings.
Notes
Nutrition

Jason’s been firing up the grill for over 30 years after graduating from the US Coast Guard Academy. His love of finely-grilled steak and chicken led him to buy his first Weber grill to put on his apartment patio in 1992. Each military move led to a new grill (a mixture of gas and charcoal) until he fell in love with the Big Green Egg in 2008. Since then, he has added another 4 grills to the collection. Yes, he has a problem. Jason loves smoking in the ceramic BGE with exotic woods including olive wood from Egypt and hard to find varieties such as sassafras and orange wood. Jason takes the term “foodie” to a whole new level, jumping at the chance to take food tours and cooking classes during foreign travels. These have provided inspiration to incorporate new ideas into recipes when he gets back home. He has been featured in Fox News, Parade, Yahoo News, Kansas City Living and more. After retiring from the military and moving to southwest Florida, he has focused grilling and smoking locally sourced meats and fish (read: he likes to catch his own fish!)


april a journey says
Excellent, true flavor of the corn , nothing to cover it up. Real butter only.
Thank you April!