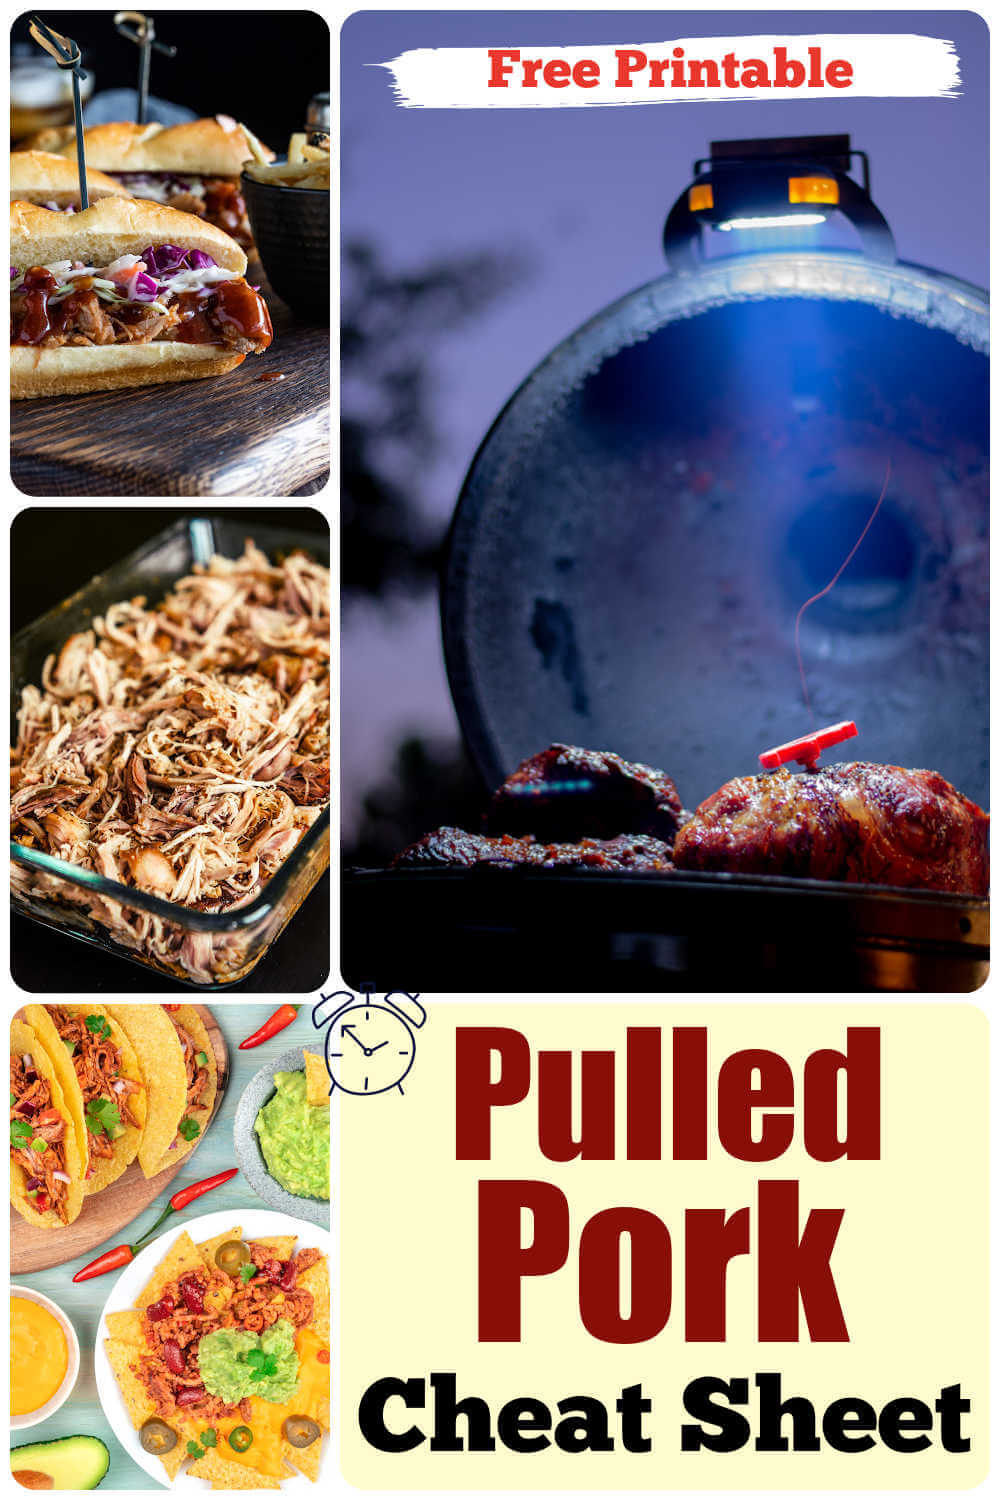
Making pulled pork with the perfect flavor and texture can be effortless! The secret is getting your pulled pork to the ideal internal temperature that will make it easy to shred without being overcooked. Our free printable pulled pork temperature chart includes complete instructions for all cooking methods, so you can get the best results!
Pulled pork has a few undeniable qualities on top of the amazing taste: it’s cheap, it lets you feed a crowd, you’ll have plenty of leftovers, and there’s an endless amount of recipes using it.
You’ll never get bored with it! You’re going to love the simplicity of smoking a pork butt with a good homemade pulled pork rub.
There are several cuts suitable for making pulled pork and many other factors that will affect how it turns out. I wanted to demystify pulled pork, whichever of these cuts you choose and make a set of step-by-step instructions that are clear as day.
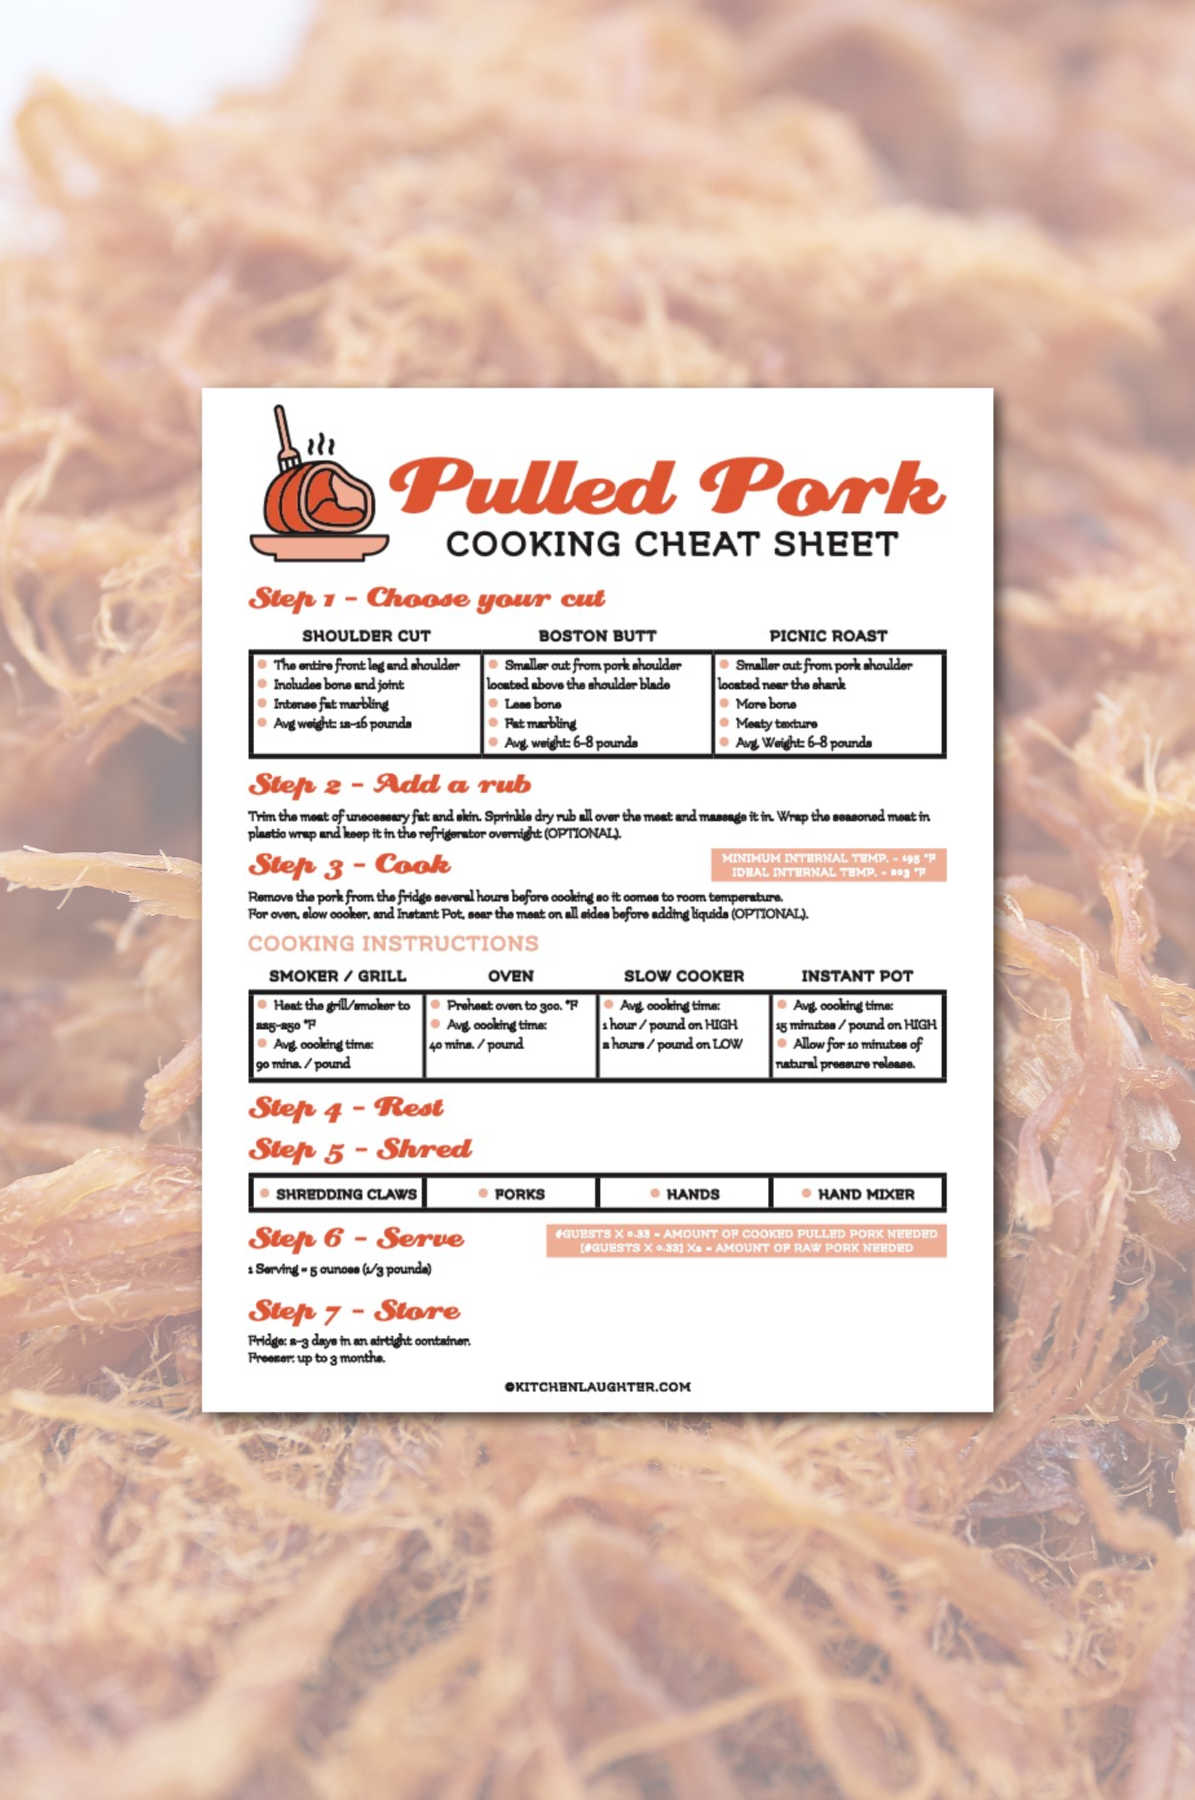
My printable chart includes:
- Choosing the best cut
- Prepping the meat
- Internal cooking temperature
- Cooking instructions for smoker/grill, oven, slow cooker, and Instant Pot
- Resting time
- Different shredding methods
- How to calculate servings
- How to store leftovers
Making pulled pork is really easy if you follow our cheat sheet and trust me, your family will keep asking for it!
🐖 How It Works
Even if you’re a beginner home chef, our free printable can help you prepare pulled pork just right. The entire process is covered step-by-step, taking out the guesswork.
I recommend you use a digital meat thermometer to measure the internal temperature of your pulled pork. There’s really no method that’s more accurate to ensure the pork meat reaches the proper doneness. The color of the meat is not always a reliable indicator. So if you’re wondering if pork can be pink even after cooking, and the answer is “sometimes!”
Reaching the perfect internal temperature makes the meat easy to shred without being mushy or too dry.
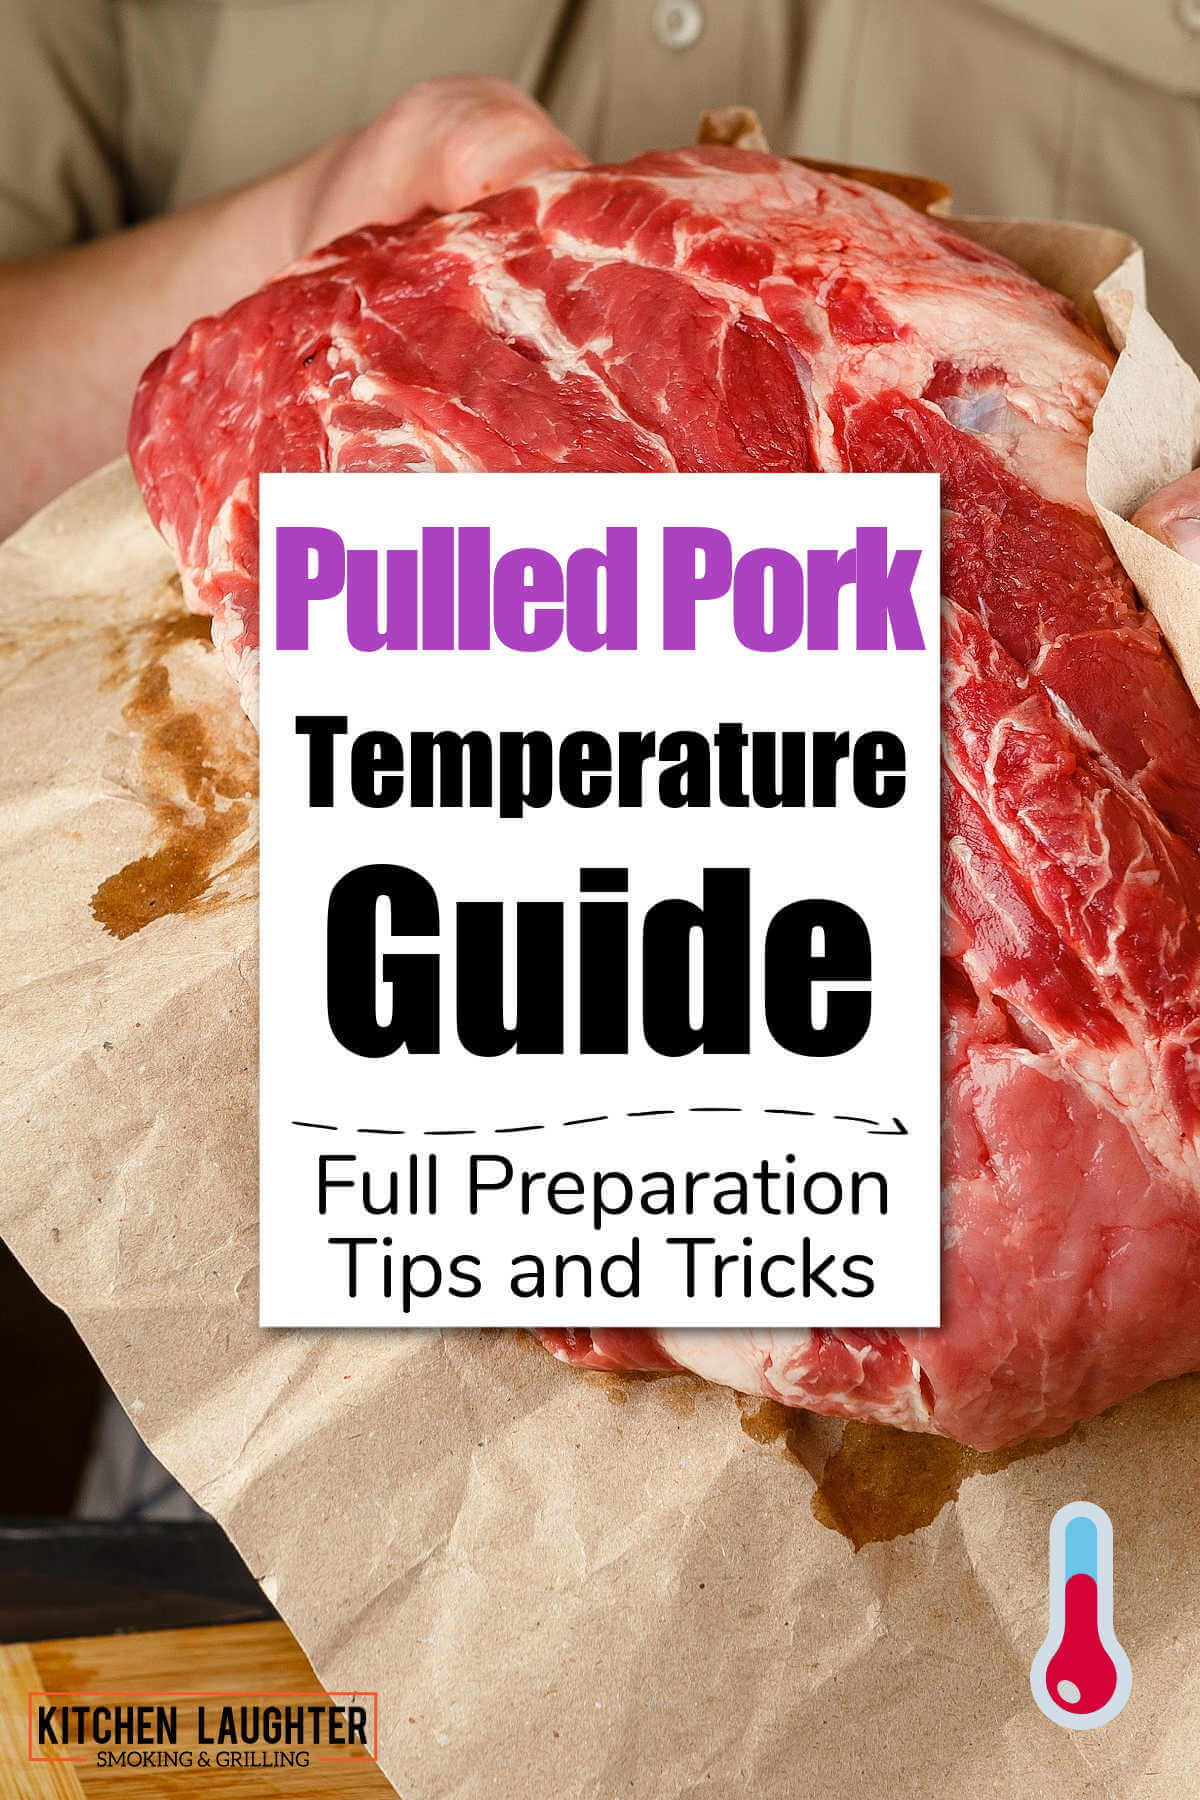
Pulled Pork Cheat Sheet
Pulled pork needs to be cooked low and slow to get that delicious shredded meat we’re all dreaming of. Of course, other factors come into play, which is why I created this cheat sheet.
It will guide you step-by-step from choosing the cut of meat, to calculating servings and storing leftovers.
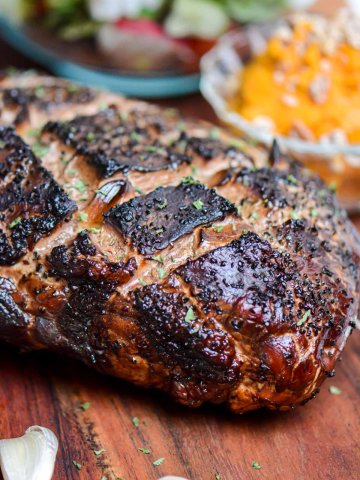
Step 1 – Choose Your Cut
Starting with the right cut of meat is really important and will have an impact on the final taste and texture. So what’s the perfect?
The pork shoulder and related cuts are typically used, which is excellent because they’re all very affordable. I highly recommend you get the Costco Pork Shoulder or Pork Butt. They are the least expensive I have found, and seem to work EVERY single time.
Whether you choose one or the other, depending on your preferences, or what’s available, you’ll still end up with a great tasting meal!
Shoulder Cut
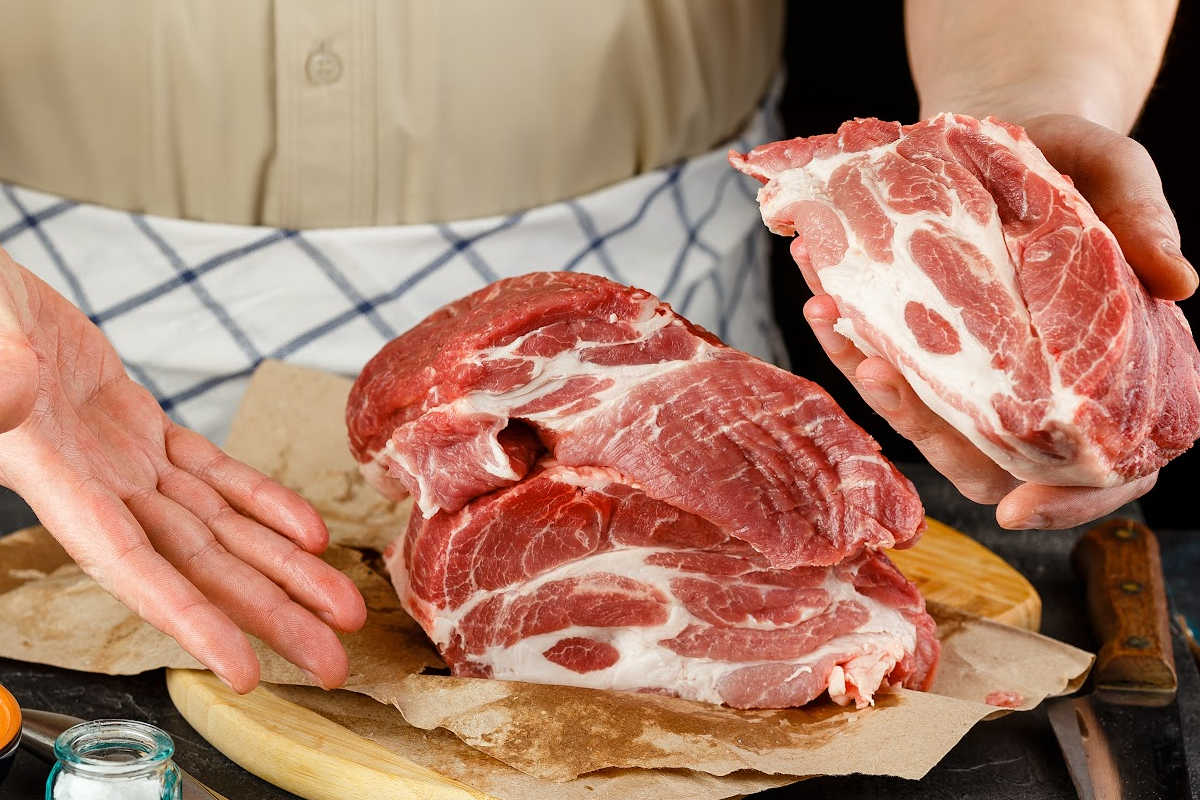
Let’s start with the most popular option, the shoulder cut.
It’s the entire front leg and shoulder of a pork, with an average weight between 12 and 16 pounds. It has a bone, and a joint, intense fat marbling and a decent amount of collagen.
Most of the fat will melt during smoking/cooking, keeping the meat juicy.
Often, you will find the shoulder cut divided into two cuts: the Boston butt, and the picnic roast. We’ll discuss these smaller cuts in more detail below.
They still make excellent options, especially if you don’t want to make such an enormous quantity of pulled pork.
Boston Butt
The Boston butt, also known as the Boston roast, is the upper part of the front shoulder. Its shape is pretty even, which makes it easy to handle.
It will weigh between 6 and 8 pounds and has plenty of fat marbling and collagen tissue.
That might look inedible, but with slow cooking/smoking most of the fat and collagen will break down and keep that meat juicy as it cooks. That’s exactly what we want!
Picnic Roast
Picnic roast is located near the shank and weighs between 6 and 8 pounds, just like the Boston butt.
Unlike the Boston butt, the picnic roast has a bone, but less fat. If you enjoy a meatier texture for your pulled pork, this is the cut you need to choose.
You might find the picnic roast without the bone as well. However, I recommend you go for the bone-in option since it’s a known flavor-enhancer.
Step 2 – Add A Rub
I think the smoker is the ideal way of cooking pulled pork, and good quality meat will taste great even if you season it with just plain salt and pepper.
Before anything else, trim off any large pieces of fat and skin. Don’t trim too much, though. That fat will render and provide amazing flavors.
You need an outer layer of ¼ – ½ inches of fat to prevent the meat from drying out.
If you want to add a rub, be generous! Thoroughly massage every nook and cranny of the uncooked pork. I typically stick with a simple salt and pepper rub, though. I make enough for tons of leftovers and I prefer to season it depending on which recipe I use.
The best rub for ribs pushes a bit of chipotle and cumin for a slight bit of heat. The All Purpose Rub covered on a pork butt will be fantastic in sliders with the heavy brown sugar base and a touch of celery seed. The All Purpose Rub on the Smoked Chicken Thighs combines more spices and yields so much flavor that it’s worth pulling a couple more from the spice cabinet.
The meat will absorb the salt and spices, becoming more tender and flavorful if you allow it to rest in the fridge tightly wrapped in foil for 12-24 hours.
Step 3 – Cook
Whatever cooking method you’ll be using, remove the pork from the fridge early enough so it comes to room temperature.
Cold meat can burn on the outside and get a tougher consistency.
If you plan to cook the pork in an oven, Instant Pot, or slow cooker, it’s a good idea to sear it on all sides so all those tasty juices remain sealed inside. Don’t forget to save all the drippings and add those into the pot you are using.
What’s The Best Internal Temperature For Pulled Pork?
The USDA recommends an internal temperature of 145°F for pork to be safe to eat. However, for pulled pork, we need to go way beyond that.
At 160°F, collagen starts to break down into gelatin and the muscle fibers loosen. This process is what will make the meat tender and easy to shred.
The minimum internal temperature recommended for pulled pork is 195°F. During the resting period, the internal temperature can rise up to 10 degrees, making the pork even more tender.
For the most amazingly easy to shred pork, let the pork cook until the thermometer reads 202-205°F.
Keeping it for longer is not recommended. Overcooking will dry out the meat.
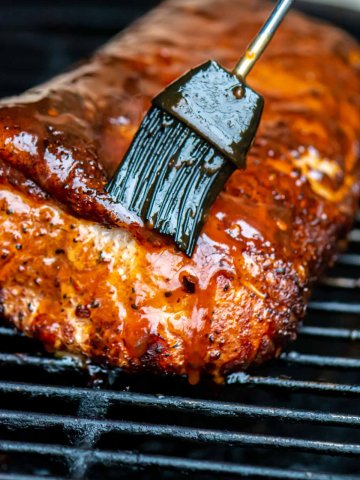
How To Cook Pulled Pork On The Grill Or Smoker
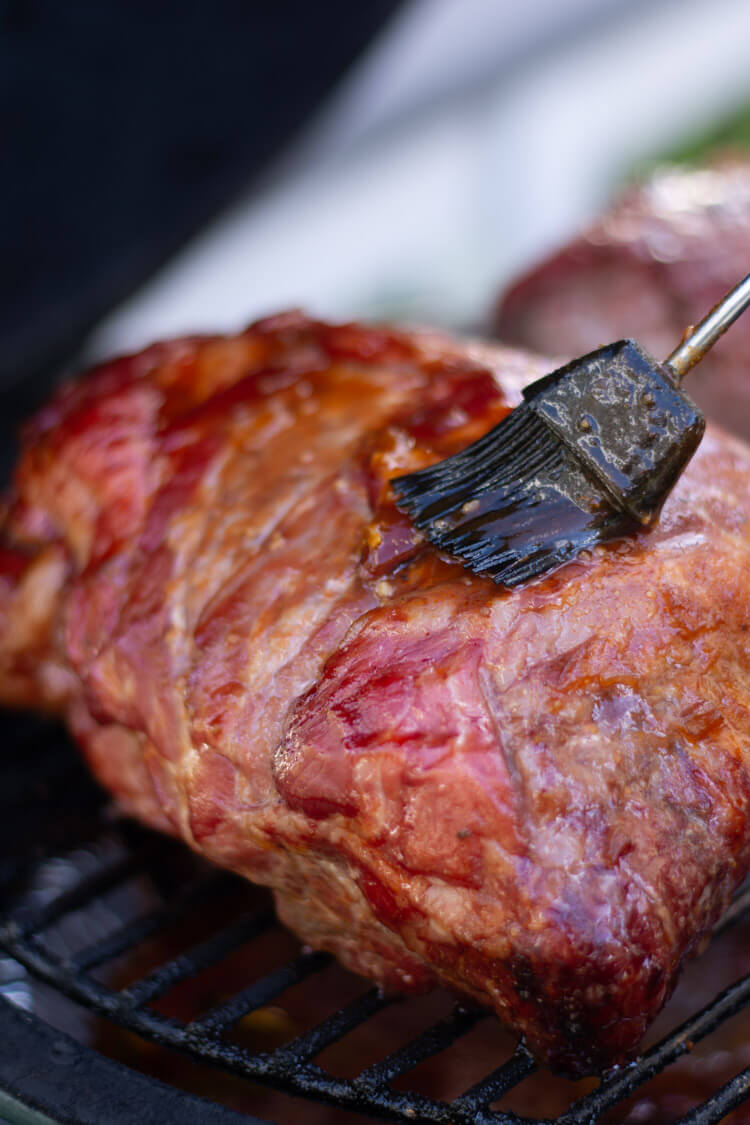
This is my absolute favorite way to prepare the pulled pork. The flavors from the grill (and some nice wood chips if smoking) just can’t be beat. You’ll end up with a nice bark on the outside that will seal in juices and make for a wonderful flavor when you shred it.
Heat the grill/smoker to 225 – 250°F.
Plan for 90 minutes of cooking time per pound of meat.
When the internal temperature reaches 160°F, it will stop rising for several hours. This phenomenon is known as “the stall” and the easiest solution is to just wait it out.
Alternatively, you can take out the pork when you get a reading of 160°F, wrap it tightly in a layer of aluminum foil or pink butcher’s paper and return it to the grill or smoker until it reaches the target temperature.
This method is known as “the Texas crutch” and it will reduce the total cooking time by a few hours.
How To Cook Pulled Pork In The Oven
The oven lets you make delicious pulled pork without too much fuss.
Searing is optional, but recommended. This will seal the juices resulting in a more flavorful and tender meat.
After searing, transfer the pork to an oven-safe pot, add liquids and any other ingredients you want for flavor enhancement.
Cover the pot with a lid and place it in an oven preheated at 300°F.
Allow the pork to cook until it reaches an internal temperature of 195°F.
During the resting period, it will raise a little over 200°F, which is needed if you want easy to shred pulled pork.
How To Cook Pulled Pork In The Slow Cooker
For the slow cooker, prep the meat just like for the oven method.
Plan for one hour of cooking time per pound on LOW (around 190°F) or two hours of cooking time per pound on HIGH (up to 300°F).
You can check the meat during the cooking process, but it’s unnecessary, especially if you’re also using a digital thermometer.
Turn off the slow cooker when the meat reaches the desired temperature and allow it to rest for at least 30 minutes.
How To Cook Pulled Pork In The Instant Pot
If you have an Instant Pot, its pressure cooking function is an excellent way to cook pulled pork fast!
After searing, transfer the pork, other ingredients, and liquid to the Instant Pot.
Plan for 15 minutes of cooking time per pound on HIGH.
Once the pork is cooked, allow for 10 minutes of natural pressure release (NPR).
Step 4 – Rest
Resting time is essential, as it allows the meat to reabsorb its own juices.
After removing from heat, let the pork rest under a layer of foil for at least 30 minutes.
Depending when you plan to serve it, the resting time can go as high as an hour.
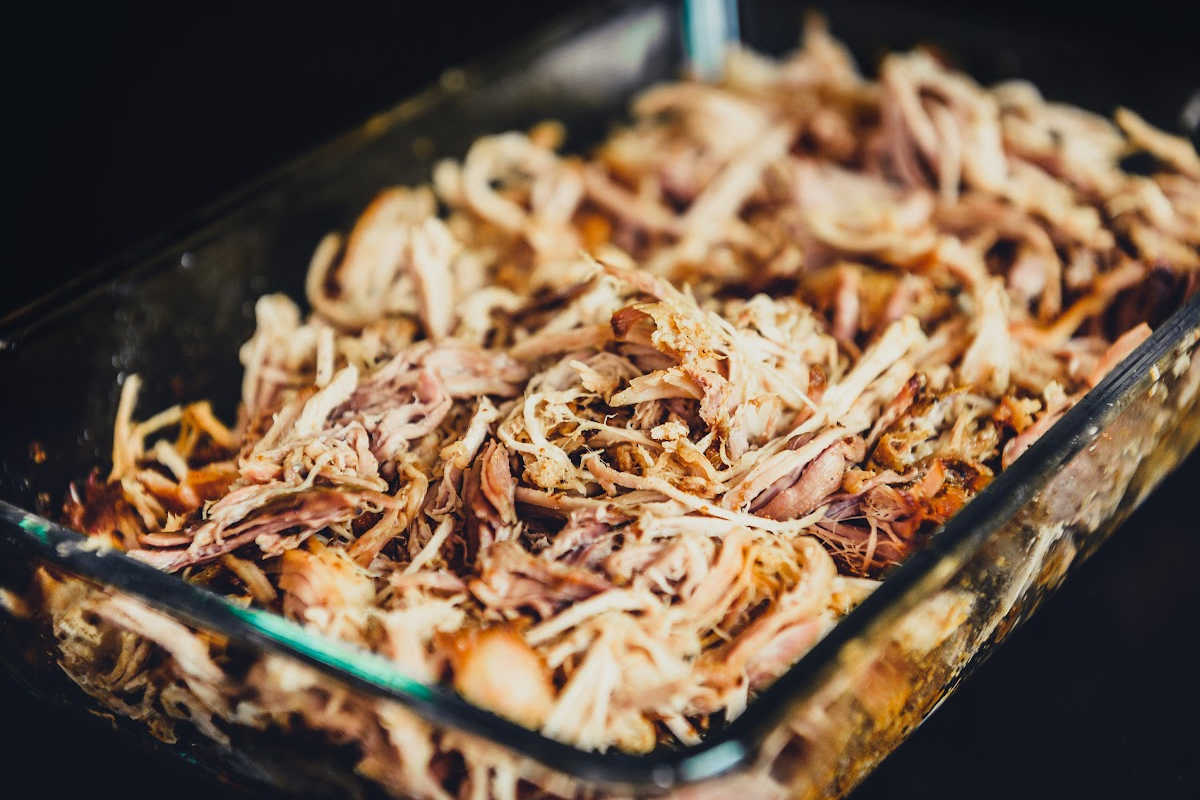
Step 5 – Shred
Is there a super special way of shredding pulled pork that will make it taste even better? Probably not!
You still have several methods to choose from:
Bare hands – This is the most time-consuming method, but it will allow you to take out any extra fat or cartilage. This would also mean the meat has cooled down enough so you don’t burn your fingers.
A couple of forks – Everyone has forks at home, so this method is both easy and convenient.
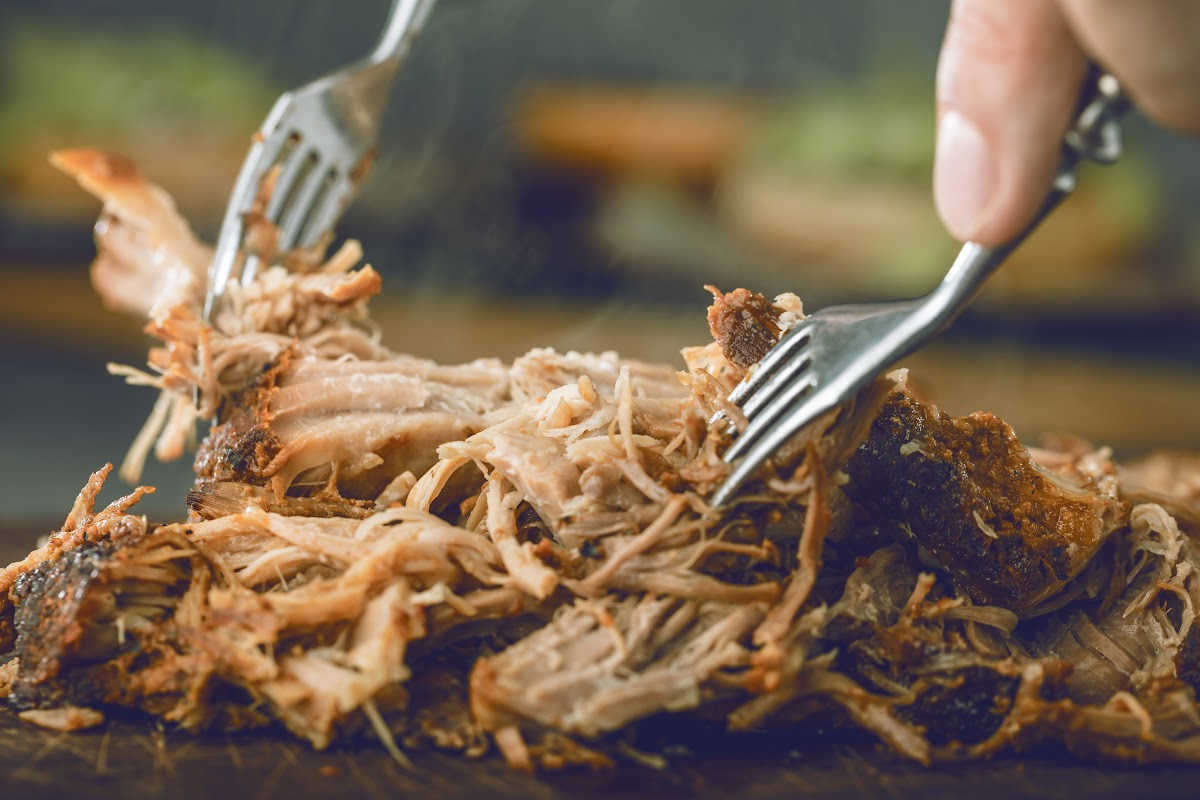
Shredding claws – These are great to have as they’re easier to use than forks and your hands will remain completely clean!
Hand mixer – The fastest way to shred a large amount of pulled pork is by using a hand mixer or a large KitchenAid Mixer. Be careful though: don’t over-process the meat or it will turn mushy.
Step 6 – Serve
What you decide to do with the pulled pork is entirely up to you. Serve it as is, accompanied by a yummy side, or use it for another recipe to keep things interesting. Don’t forget your favorite sauce! We love making our own homemade sauces when we have the free time for flavor that just can’t be beat! Quick Bourbon Smoked Pumpkin BBQ Sauce, Whiskey BBQ Sauce, Honey Sriracha Sauce, Cherry Bourbon Sauce, Hawaiian BBQ Sauce, Habanero BBQ Sauce, Dr Pepper BBQ Sauce and Beer BBQ Sauce.
How To Calculate Servings For Pulled Pork
The standard serving size for pulled pork is 5 ounces or ⅓ pounds of cooked pork per person. For small children, use only half of that.
To calculate how many people your cooked pork will serve, use the following formula:
#GUESTS x 0.33 = AMOUNT OF COOKED PULLED PORK NEEDED
Cooked pork will lose about half of its raw weight during the cooking process. To plan your servings ahead so you know how much raw pork is needed, use the formula below:
[#GUESTS x 0.33] x2 = AMOUNT OF RAW PORK NEEDED
If your pork cut has a bone, you will get even less than 50% of the raw weight, so you may need to opt for a larger cut depending on how many people you need to feed.
Step 7 – Store
Pulled pork takes a long time to cook, so it’s understandable if you make a large amount and store the leftovers.
You will love how it reheats well and there are tons of pulled pork leftover recipes so it’s definitely worth making extra. One of our family’s favorites is the Pulled Pork Nachos.
If you plan to eat the leftovers within the next 2-3 days, you can place the meat in an airtight container and keep it in the fridge.
In the freezer, it will keep for up to three months. The best ways to store is in the freezer are in a vacuum sealed bag, or in a freezer-safe bag.
To prevent waste, you can freeze individual servings.
How To Grab
You can easily make the perfect pulled pork at home by using our free printable Cheat Sheet.
Enter your name and email in the form below and the PDF will be sent to your inbox from where you can download it.
Related Articles


Ginny Collins is a passionate foodie and recipe creator of Savor and Savvy and Kitchenlaughter. Indoors she focuses on easy, quick recipes for busy families and kitchen basics. Outdoors, she focuses on backyard grilling and smoking to bring family and friends together. She is a lifelong learner who is always taking cooking classes on her travels overseas and stateside. Her work has been featured on MSN, Parade, Fox News, Yahoo, Cosmopolitan, Elle, and many local news outlets. She lives in Florida where you will find her outside on the water in her kayak, riding her bike on trails, and planning her next overseas adventure.
Leave a Reply