Let’s talk about a kitchen trick that sounds a little intimidating but is a total game-changer: spatchcocking. This simple technique will get you a whole chicken on the dinner table in under an hour! And everything will be cooked evenly! I’m going to show you the ropes on how to spatchcock a chicken two ways. Whether you’re more comfortable with a sharp knife or a trusty pair of scissors, you won’t have any trouble flattening the bird.

Spatchcocking is a funny word, isn’t it? It’s also known as butterflying the chicken. The end goal is to flatten the bird. This is THE secret to getting that beautiful, crispy skin and incredibly moist meat in record time.
The only other way to cook chicken faster is to give up on the whole chicken and opt for parts. However, a whole grilled or roasted chicken has an undeniable charm.
When my son, Spencer, was still living at home, this was my go-to for a quick weeknight dinner that felt like a treat. Today, I’m breaking it all down for you. We’ll cover how to spatchcock a chicken using either a sharp knife or a pair of heavy-duty kitchen shears. You’ll wonder why you didn’t try this sooner!
🍽️ Equipment
✔️A whole, raw chicken – This also works for turkey and other birds.
✔️A pair of kitchen shears OR a sharp chef’s knife – I’ll show you how to use both but fair warning: the kitchen scissors method is easier for a beginner.
✔️Cutting board
✂️ 1- How To Spatchcock A Chicken With A Pair Of Scissors (Backbone Removal)
This is my go-to method because it feels the most controlled – it’s also the best one to try if you’re new to cooking. All you need is a little bit of muscle and a good pair of shears.

👉Step 1 – First things first, take your chicken out of the packaging and pat it dry with some paper towels. Place it on your cutting board with the breast-side down. You should be looking right at the backbone running down the center.

👉Step 2 – Now, grab those trusty shears! Starting at the tail end of the chicken (the part with the most skin), begin cutting along one side of the backbone. You’ll be cutting through the small rib bones, so you’ll need to use a firm grip and a little bit of oomph. Cut all the way up to the neck.

Once you’ve made one complete cut, just repeat the exact same thing on the other side of the backbone. When you’re done, you can lift the entire backbone right out!
📌 Tip: Don’t you dare throw that backbone! Pop it into a freezer bag and save it. When you have 3-4, you are ready to make a rich and flavorful homemade chicken stock.

👉Step 3 – You’re almost there! Flip the chicken over so it’s now breast-side up. It will kind of look like an open book. Place the heel of your hand directly on the center of the breastbone and press down firmly and confidently.
You’ll probably hear a satisfying little crack – that’s exactly what you want! That sound means the wishbone has broken, allowing the chicken to lie completely flat.
🔪 2 – How To Spatchcock A Chicken With A Chef’s Knife (Splitting The Breastbone)
If you don’t own a pair of kitchen shears, no worries at all! A good, sharp chef’s knife will get the job done too. This method requires a bit more confidence and a steady hand, so please be extra careful and keep those fingers tucked away safely.
And really make sure that knife is sharp – a dull knife makes such tasks a lot harder.

👉Step 1 – For the knife method, you’ll start with the chicken breast-side up. Place it flat on your cutting board with the breasts facing you.

👉Step 2 – This is the most important step, so take your time. Position the tip of your chef’s knife right in the center of the chicken, where the two breasts meet at the cavity opening.
With your other hand placed safely on top of the spine to hold the chicken steady, apply firm, even pressure to cut straight down and through the breastbone. Follow this line all the way to the neck.

👉Step 3 – With the breastbone now split, you can easily open the chicken up like a book – just use your hands to pry it apart.

Flip it over so the cut side is facing down. Just like with the other method, give the backbone a firm press with the heel of your hand to flatten it out completely.
There you have it! Two simple ways to get a perfectly prepped chicken, ready for cooking.
📌 Tips For Cooking A Spatchcocked Chicken
Okay, now you have a flattened bird, so how do you give it the perfect treatment to get that crispy skin and juicy meat?
🔸Take the chicken out of the fridge and let it sit at room temperature for 30 minutes. It’s always good to let it warm up a bit, as this helps it cook faster and more evenly.
🔸You can spatchcock the bird, season it, and let it dry brine for up to 24 hours in the fridge to have it ready for cooking the next day.
🔸If you’re aiming for that perfectly crispy skin, pat the chicken dry with paper towels before seasoning.
🔸Always use a meat thermometer to ensure doneness. The internal temperature needs to be 165°F for the breast and 175°F for the dark meat (legs and wings).
👩🏻🍳 Cooking Methods For Spatchcocked Chicken
Every way you can cook a regular whole chicken will work for a spatchcocked one, and other butterflied birds. Whatever method you use, the chicken will be ready when a meat thermometer inserted into the thickest part of the breast reads 165°F and the thigh reads 175°F.
Oven Roasting
This is the simplest, most foolproof method, and it gives you that classic roasted chicken dinner flavor with unbelievably crispy skin.
Preheat your oven to 425°F (about 220°C). That high heat is the secret to getting the skin nice and crispy without overcooking the meat. Roast the chicken skin-side up. This will take about 40-50 minutes.
Air Frying
This method works best for smaller chickens, typically in the 3-4 pound range. You need to be sure the flattened chicken can lie in a single layer in your air fryer basket without being too crowded.
Preheat your air fryer to 360°F (about 180°C). This seems to be the magic temperature that cooks the chicken through without burning the skin. Lay the chicken in the air fryer basket skin-side up.
As always, the best way to know when it’s done is to use a meat thermometer. You’re looking for an internal temperature of 165°F in the breast and 175°F in the thigh. Start checking around the 30-minute mark to be safe. The exact cooking time can vary a lot based on the size of your chicken and your specific air fryer model. It can take 30-50 minutes so rely on the internal temp as the main indicator of doneness.
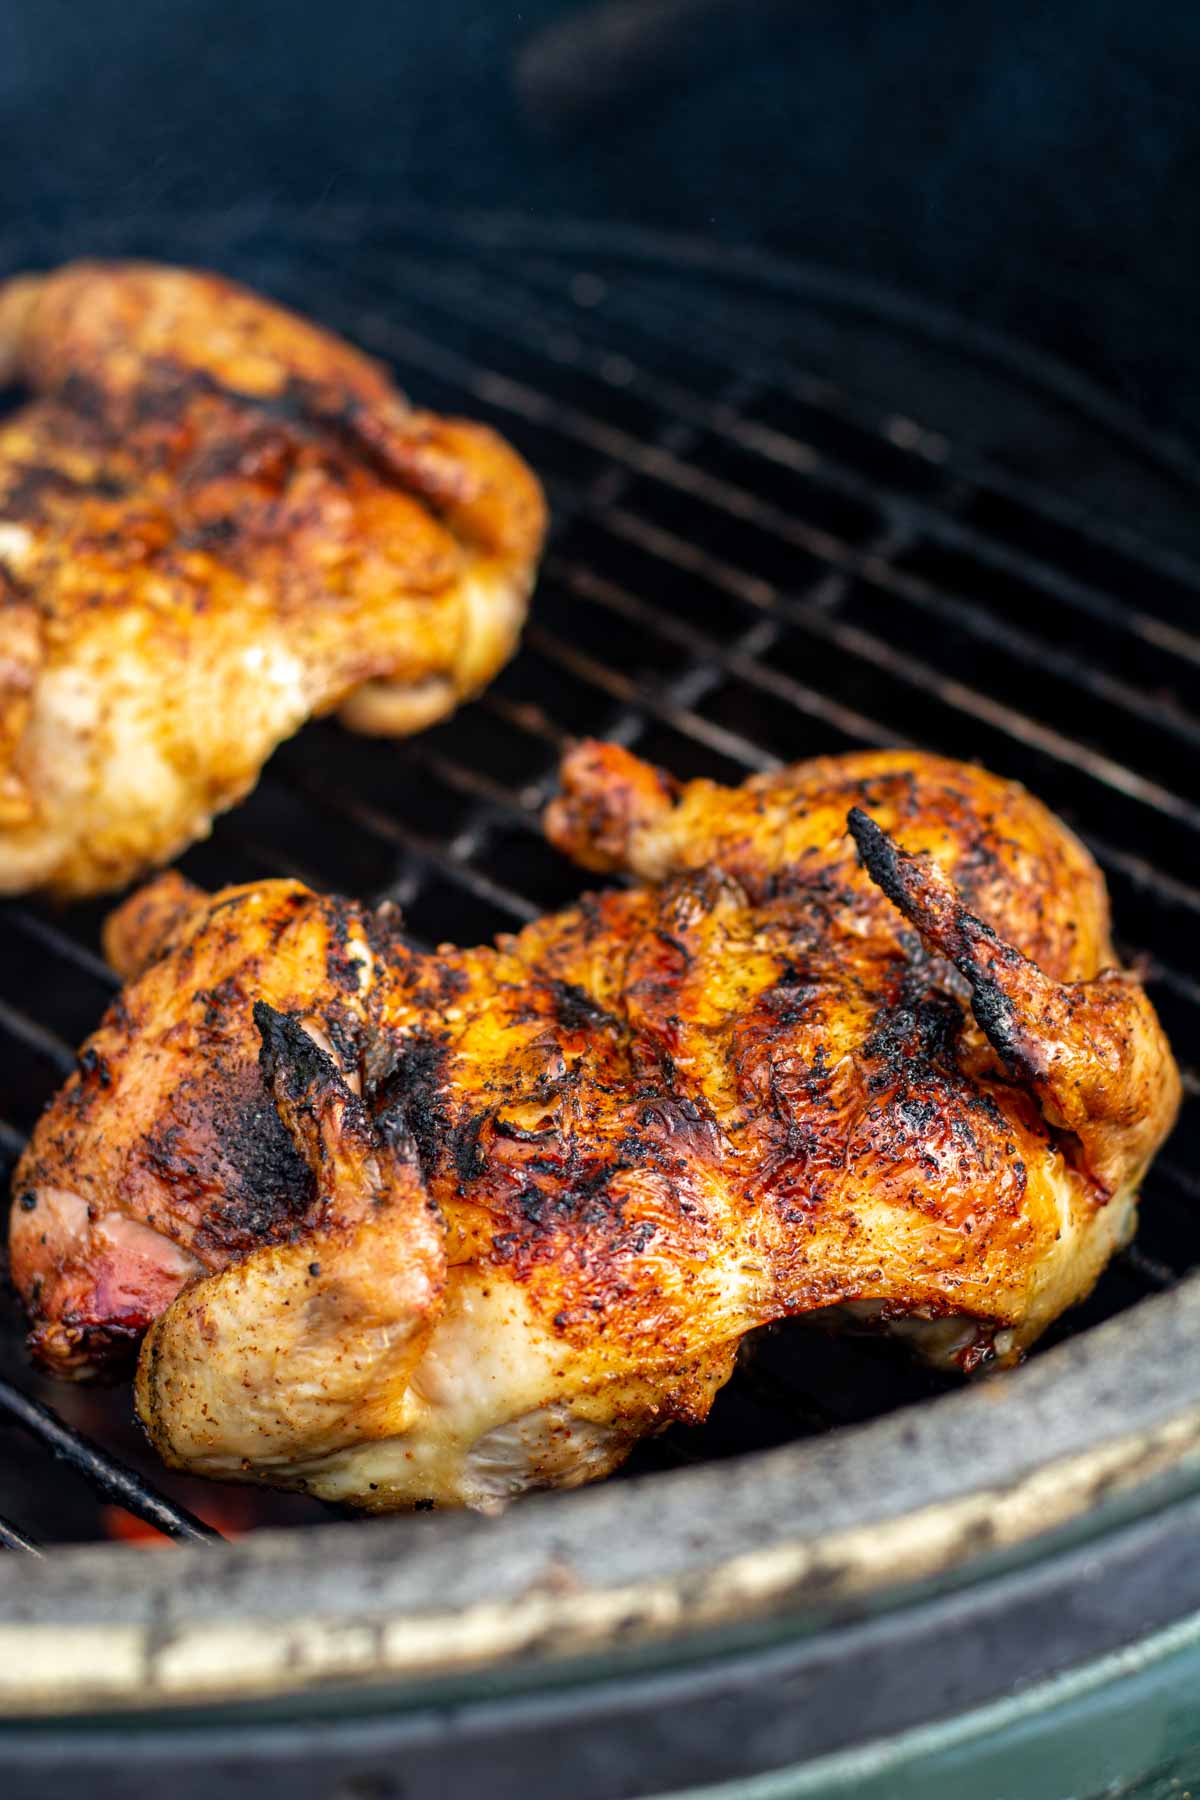
Grilling
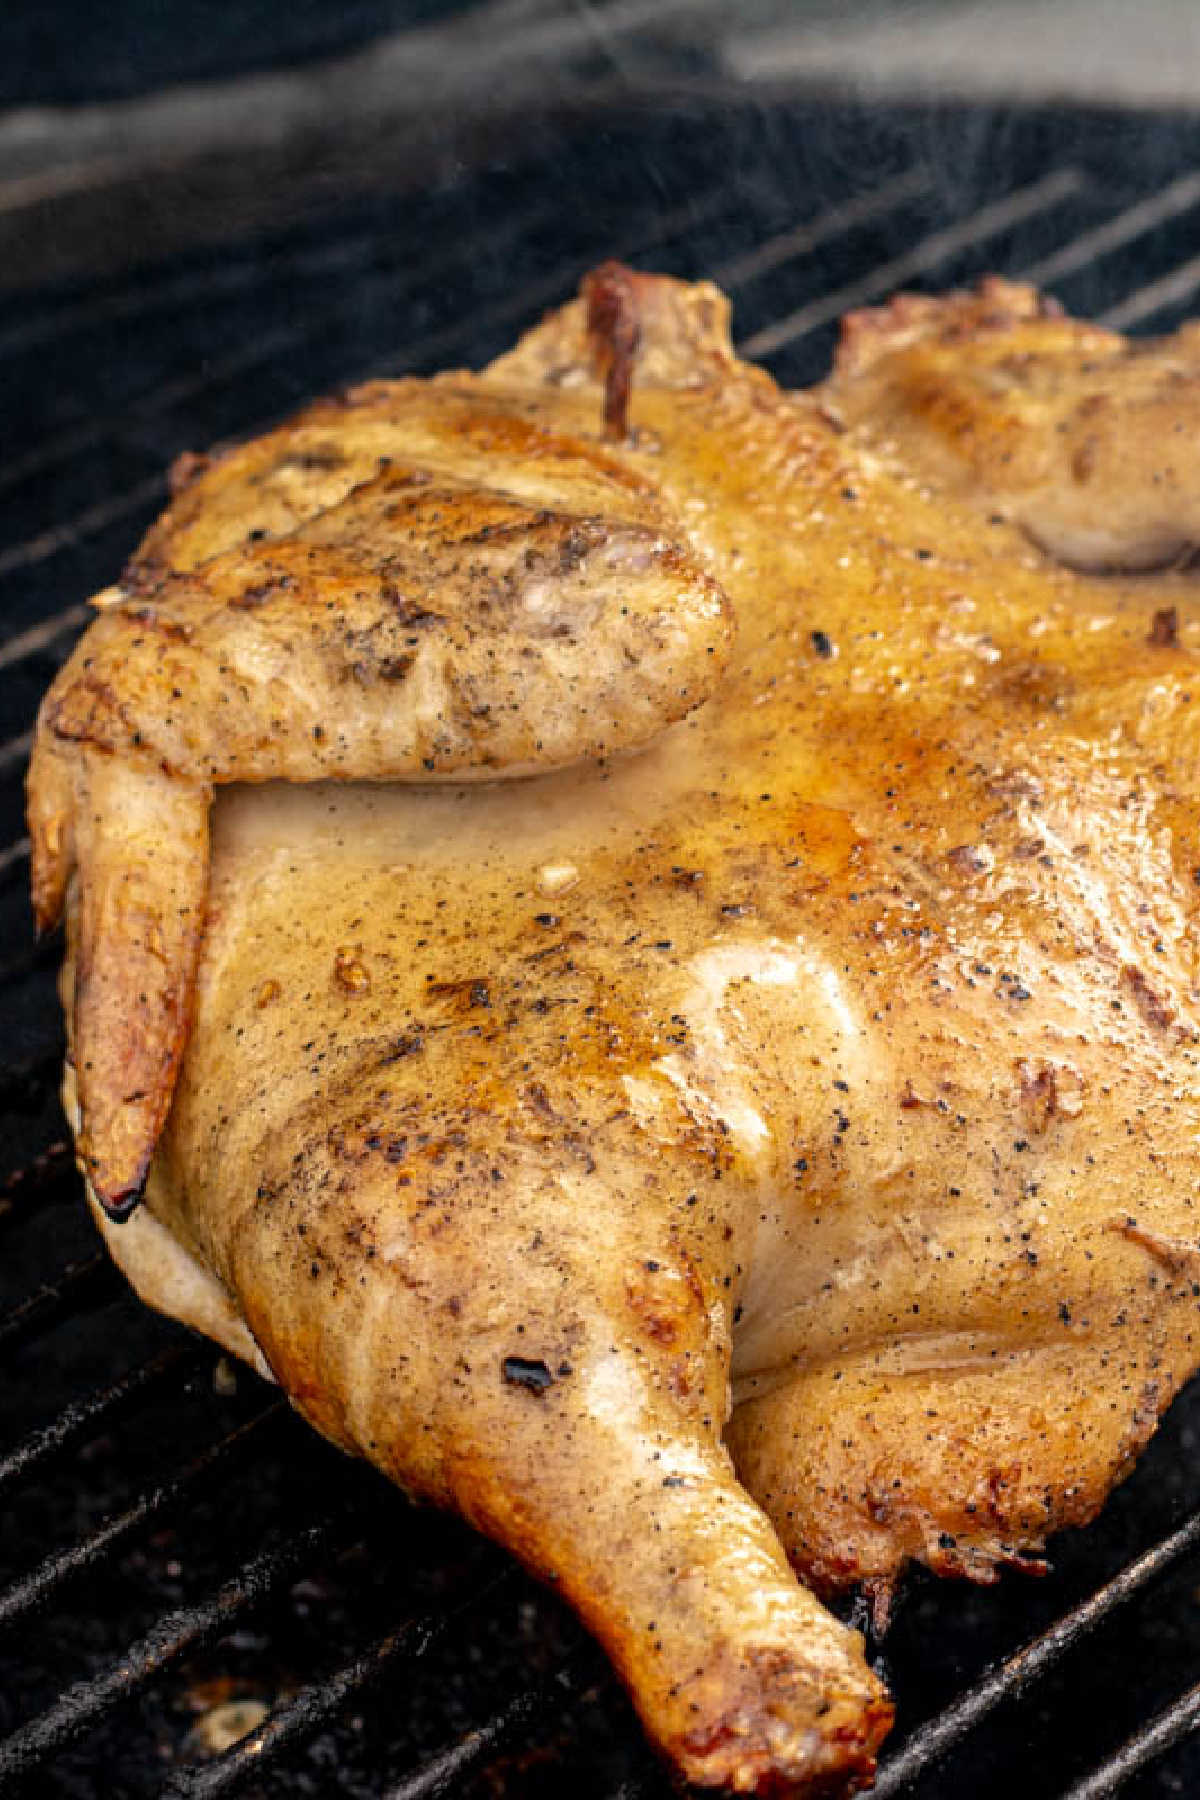
We love using our grill and it helped us flawlessly cook lots of spatchcocked birds over the years. You can’t get that fantastic smoky flavor from the oven!
Preheat the grill to 325-350°F and set up an indirect cooking zone. Cook the chicken skin-side down for the first 15 minutes, then flip it and let it continue grilling until it reaches the recommended internal temperature (165°F for the breast and 175°F for the dark meat). This usually takes around 35-45 minutes.
See my grilled spatchcocked chicken recipe for all step-by-step instructions.
Smoking
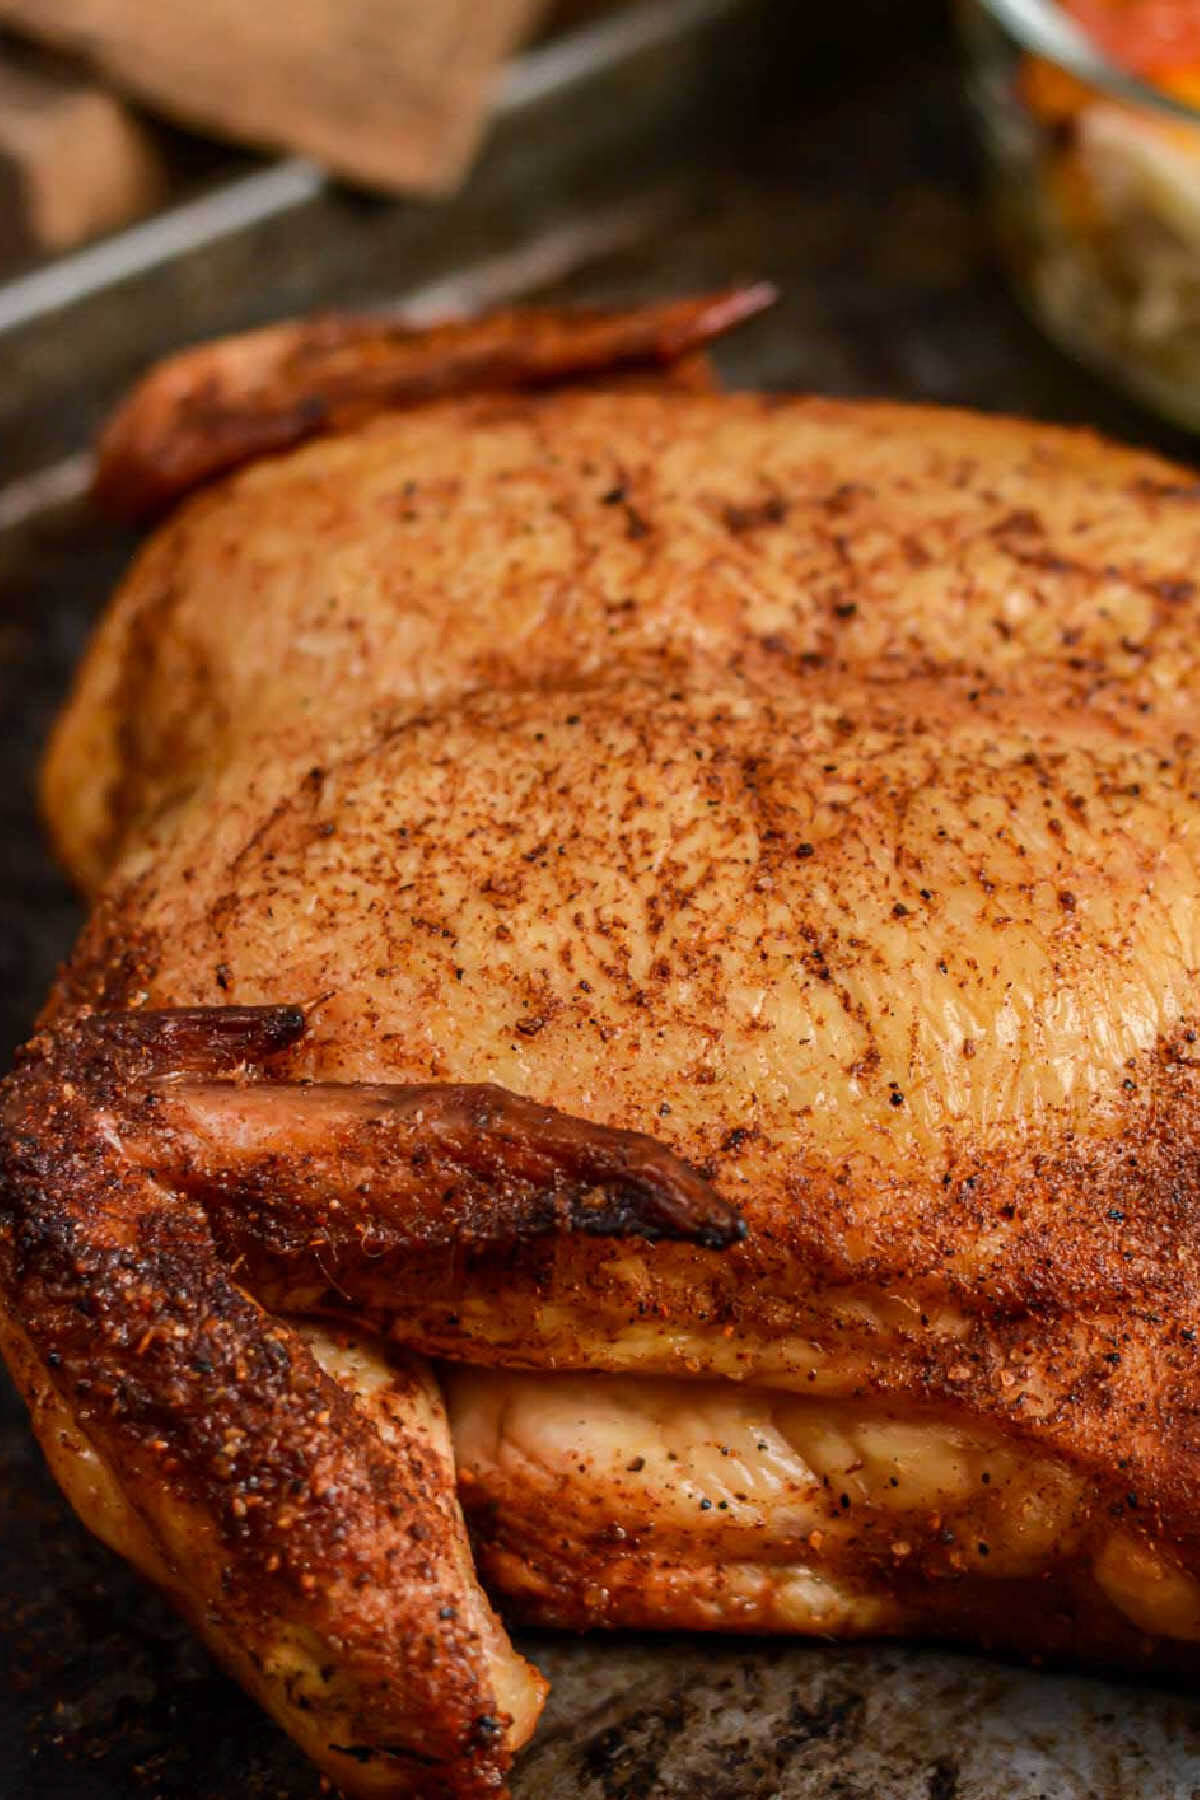
If you have a smoker and some time on your hands, you are in for a real treat. Smoking a spatchcocked chicken gives it the most incredible, deep flavor.
Preheat your smoker to 300°F – feel free to use any mild smoking wood like apple or cherry.
Place the chicken on the smoker grate skin side up, and let it cook until it reaches the target temperatures of 165°F in the breast and 175°F in the thigh. This usually takes 75-90 minutes for us, but the internal temp is more important than the total time.
For all the details, head over to my smoked spatchcock chicken recipe.
Other Birds
Did you know this amazing technique isn’t just for chicken? Once you master it, you can apply it to all sorts of poultry.

⭐Turkey – For holidays like Thanksgiving, spatchcocking a turkey can be a life-saver, especially if you didn’t place it in the oven as soon as you should have. It cuts the cooking time dramatically and guarantees a juicy bird. We have recipes for both grilled spatchcock Turkey and smoked spatchcock turkey that will help you serve dinner in time and get some raving reviews!
⭐Cornish Hens – If you’re looking for a fancy meal for two or individual servings for a get-together, you can make grilled spatchcock Cornish hens. They cook in no time and look so impressive on the plate!

Jason’s been firing up the grill for over 30 years after graduating from the US Coast Guard Academy. His love of finely-grilled steak and chicken led him to buy his first Weber grill to put on his apartment patio in 1992. Each military move led to a new grill (a mixture of gas and charcoal) until he fell in love with the Big Green Egg in 2008. Since then, he has added another 4 grills to the collection. Yes, he has a problem. Jason loves smoking in the ceramic BGE with exotic woods including olive wood from Egypt and hard to find varieties such as sassafras and orange wood. Jason takes the term “foodie” to a whole new level, jumping at the chance to take food tours and cooking classes during foreign travels. These have provided inspiration to incorporate new ideas into recipes when he gets back home. He has been featured in Fox News, Parade, Yahoo News, Kansas City Living and more. After retiring from the military and moving to southwest Florida, he has focused grilling and smoking locally sourced meats and fish (read: he likes to catch his own fish!)


Leave a Reply